Posted on 1 Comment

Pompero – step by step

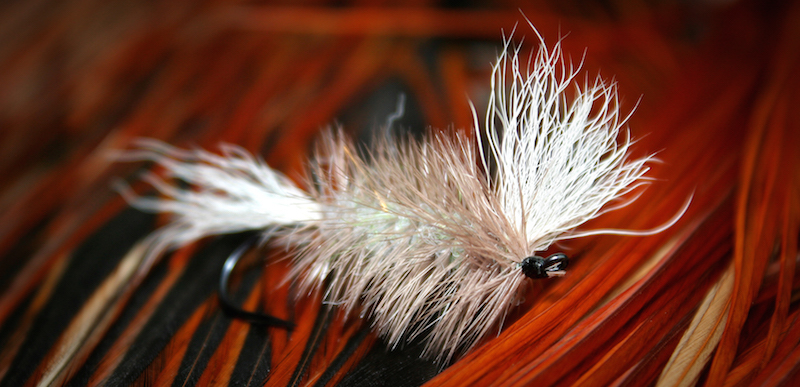
Chasing Atlantic silver with dry flies is my favorite thing to do and also by far the most effective way to catch the fabled salmon for me. And my favorite dry is a Finnish specialty, Pompero. It has a lot common with Bomber, but there are some key elements that differentiate Pompero from its more famous American cousin.

The fly was originally made famous by Heikki Anttonen, who is now a days known in the smallish Finnish fly fishing social media scene as Mr. Pompero. As usual, people have adapted the fly to suit their style of fishing or just to please their eye more, and I’m no exception. This is the way I tie Pompero, and it has been very productive for me. But for example my dear fishing buddy ties quite many things differently and catches even more fish than me with the Pompero (and with any other fly for that matter), so I’m pretty certain that it’s less about the exact details and more about the way you fish the fly (of which talk more about in my article on issue 4/2014).

As you can see, I’m not such a skilled craftsman as some of my colleagues here in CS blogosphere, but for the fly to be effective it doesn’t necessarily need to look pretty for human eyes. Anyways, here’s the way I do it.


Pompero

  • Hook: #4 TMC 7989
  • Thread: Black
  • Tail: White calf tail
  • Body: Grey polypropylene, shaped as cigar
  • Hackle: Dun
  • Wing: White calf tail
  • Head: Thread

Pompero is quite an simple fly to tie and you can do without a lengthy list of materials often required for more classical patterns. Basically you need just a hook, some calf tail, polypropylene and a good quality hackle.

Matsku


Hook

My standard choice of hook has lately been TMC 7989 in size 4. It has quite light wire, which makes for a nice high floating fly but is lacking when fighting the big fish. The size 4 has a little thicker wire and so far I haven’t lost a fish because of the hook (though they really haven’t been put to test with the biggest fish in the hardest places), but especially the size 6 feels just too light for me, so I’m still looking for the right hook for smaller Pomperos. Right now I’m using TMC 5212 terrestrial hooks for them, but lost a few fish because of the hook last summer, so I’m not completely satisfied with it.

Another good option is Partridge’s CS42 with the standard size being 6 (it actually makes for a slightly bigger fly than #4 TMC). It has been proven to be a truly durable hook. Downside in it is that the point of the hook is really short and it wears out when sharpening the hook. Good thing with dries is that you don’t have to sharpen them so often, since they’re not hitting the bottom.

I also know few people who like to use heavy wired nymph hooks especially in smaller sizes to help when you fight with that 15 kilo monster, but so far I haven’t been willing to make the trade-off with floatability. Maybe that will happen after I lose the first truly big one because of the hook.


Body

I make the material for the body by cutting some polypropylene yard into about 1 centimeter pieces. Then I Pluck and roll the material in your hands to brake fiber and mix it up. I usually mix just a hint of green or red yard into the body. I honestly think it’s more because of a habit than anything that really affects the fishing. This way I can change flies into something a little different if the need arises, but I really haven’t observed any significant differences because of this toning.

You can of course make some more radical changes to colors of the fly for example by adding a hot spot or a belt into the fly. Or you can tie the whole fly in completely different colors. But for me just the basic grey has by far been the most productive color and the standard size 4 grey Pompero is my first weapon of choice in any dry fly fishing situation.


Hackle

Finding the right kind of hackle is by far the most challenging part of tying the Pompero. The hackle in Pompero needs to be thick with stiff barbs, since the main thing keeping the fly afloat is the hackle. This is one thing that differentiates it from Bomber, which is floating more on its deer hair body.

The best feathers that are long enough (were talking minimum of 15 centimeters here) and have long, but even barbs that don’t taper too much are found in saddles. The best saddles to find these are most often the lower grade ones. The modern saddles have been genetically bred to have optimal material for dries the size 10 and below. This, alongside with the low availability of saddles have made the right kind of hackle material hard to find. Web stores are not much of a use here, since you have to inspect the saddles yourself to find the right ones.

Even the most suitable candidates usually have maybe 10-20 great and another 10-20 adequate feathers. Every time I visit a fly shop, local or one that is new to me, I always browse through their storages of saddles in case I find right kind of material. If I run into one, I immediately purchase it. The last decent saddle I found was two years ago. I’m just happy I’m not tying these things commercially, since it would really be a pain in the ass to be continually searching for the right hackle material.

Right now I have two suitable saddles, older Hareline Pro Grade Dun saddle that is perfect and cost me only 20€. I have for long thought that I have used all the usable feathers from it, but still find a few suitable candidates if I look for long enough. Newer and more expensive saddle is Whiting Pro Grade, but it’s not as productive as was Hareline in its heyday. Too much material for smaller flies.

In case you can’t find suitable material it’s possible to tie the hackle in two parts: first the one for the body and another around the wing. In these cases you might find usable material from some necks also, but generally the best hackles comes from the saddles.


Tying

1Start the fly by building a nice base with thread. The color of the thread doesn’t matter much, you can use white, black or maybe even some brighter color to make a nice hot spot on the head. With TMC I like to use black thread for the classic looks.

Take a nice bunch of white calf tail for the tail. The tail can be quite thick since it is important part of the shape the fly leaves on the surface. Longest hairs should be about the length of the hook and thicker part length of the body.


2

Tie the tail in. Cut it about 2/3 of the length of body and secure firmly with thread.


3

Take a bit thicker bunch of white calf tail for the wing and use hair stacker to make it even. Tie it in and then secure by going towards the eye of the hook with the thread. Leave enough room for a few turns of hackle and a head.


4

Spread the wing out to form a nice V-shape. Prop the wing up with the tying thread. Then cut the excess material from three different lengths to make it tapered. Secure with thread to make nice cigar-shaped base to build the actual body on.


5

Tie in the hackle from the tip of the stem.


6

Dub some polypropylene on the thread and start building the body. When dubbing the body I have lately been doing the same thing as Mr. Pompero himself and use this natural wax that is made for leather shoes to keep them dry. It helps with the polypropylene (it can be a bit difficult to handle because the fiber is quite rough) and the fly floats better when you soak the whole thing with the stuff when you’re tying it even if you use floatant on the riverside.

Once again it’s not a necessity, I did just fine without the wax for quite many years, just a small helpful gimmick. I didn’t use it when tying the fly photographed here since it makes the fly look a bit silly and wet before it settles in.


7

Continue building a nice cigar-shaped body from the polypropylene.


8

Roll the hackle around the body in even turns. Make the hackle quite thick.

This can be a tricky part, since it’s easy to break the light stem when you start to roll it around the body. Some use thin monofilament line to secure the hackle. This makes the fly more durable, but I’m often too lazy to do this and been doing ok even without the extra reinforcement.


9

Make thicker turns of hackle near the base of the wing. I tend to tie the wing in upright position and then it’s possible to make some turns on the other side of the wing also. You can also leave the wing in Bomber-style forward-leaning position. Then you naturally can’t tie the hackle in front of the wing.

Secure the hackle, form a nice head and use some super glue or varnish to finish the fly.

And there you have it. Pompero is simple yet amazingly efficient fly for Atlantic Salmon. It can be also used for any species interested in dry flies by varying sizes and coloration. For example a slightly smaller Pompero in size 6 or 8 is an excellent attractor pattern for brown and rainbow trout. And it’s a ton of fun to fish with dries, so I strongly recommend to give it a try.


Valmis1_1

Posted on 5 Comments

Traherne – step by step

Related to my article “Major Traherne – Top of the Classics” published in issue 3/2014 here’s a thorough step-by step guide with advanced tying tips and tricks. In the following fifty images I tie one of Traherne’s patterns Nepenthian. All feedback and discussion welcome using the comment box at the end of the article.


Take a short piece of gut, moisten it to make it softer and fold it around a stiletto to form the eye.  Tie it in underneath the hook shank and add a layer of varnish to secure it.
Take a short piece of gut, moisten it to make it softer and fold it around a stiletto to form the eye. Tie it in underneath the hook shank and add a layer of varnish to secure it.
Start building an underbody with 210 denier UNI-Nylon or similar flat thread.
Build a taper by going back and forth with touching turns of thread. First turn in the middle of the shank. Second 3/4 of the shank.
Last turn all the way at the back close to the point of the barb.
Burnish the underbody with a smooth object and attach your tying thread to the front and bring it back to about the point of the hook with touching turns.
Attach tinsel for the tip of the tag underneath the hook shank just slightly to the opposite side of the hook so that when you turn your first wrap it will start straight at the center.
Wrap 3 to 5 tight turns of tinsel from back to front and tie the tinsel in so that the last wrap doesn’t overlap the tag-end. Turn the excess adjacent to the shank and wrap forward to the point where you want your tail to be.
Attach a piece of floss underneath the shank. Burnish the underbody again and the tinsel tip too to make it smoother.
Wrap the floss carefully to the tinsel and back again and tie it in underneath the hook shank with couple of turns.
Strip off excess fibers from the topping and flatten the stem from the tie in point with pliers. Tie it in straight on top of the shank.
Do the same with an Indian Crow feather and try to tie it in flat straight on top of the topping.
Tie in a butt from blue Ostrich herl.
Tie the rib in underneath and again slightly on the opposite side of the hook. You can measure and mark the different body section with a marker, just make sure to measure space for the butts too.
Wrap forward again in touching turns and attach the floss for the first body section.
Make the rib with 5 turns of tinsel and try to keep the angle of the tinsel consistent.
Tie in a pair of Blue Chatterer feathers for the body veiling. Flatten the stems again to make the feathers easier to align.
Repeat on the other side of the hook.
Add another butt and rib as before.
Wrap the second body part and rib. To minimise the bulk of the tinsel at the tie in point you can tie it in with a couple of wraps and before cutting unravel the metal from the core which allows you to cut closer and make a smoother transition.
Tie in veilings of Toucan as before. You can play with the position where you tie them due to the shape of the rachis some feathers are easier to tie on the sides to achieve similar results instead of straight under the shank.
On the top it’s best to leave a gap between the ceilings for the wing to sit in.
When tying Ostrich herl for the butt make sure that when you start winding it the small barbules face backwards.

Image 23.

To minimise the bulk on the head you can reverse the tying of the last floss part.
Try to keep thread wraps minimal from this point forward as there is a lot of materials to tie on a tiny piece of hook.
The narrowing taper in front makes ribbing a bit harder but again try to keep the angle the same all the way.
Pay attention to proportions throughout the tying process.
Tie in three pairs of Indian Crow underneath the hook shank.
Because of the thick rachis on even the smaller Macaw feathers you can split the feather before tying.
Start the hackle from the top so that you’ll get more wraps on the sides and brow the hook.
Wrap the hackle in touching turns.
You can strip the fibers from the top to not get in the way of the wing. Moisten the hackle and draw it down.
Tie in the underwing straight on top to the shank.
Pick feathers that are just the correct length and form perfect pairs.
Flatten every feather with pliers before tying to achieve smaller and more secure tie in point.
View from above of the first pairs. Make sure the wing is symmetrical and straight.
Keep adding feathers in pairs to form the rest of the wing.
Pay close attention to the angle where every feather starts as it will define the shape of the wing.
Tie a narrow strip of Golden Pheasant tail over the wing.
Measure and shape the topping before tying it in. As with other feathers flatten the tie in point and fold it so that the topping doesn’t compress the wing but hugs it closely.
Check the fly from above and make sure the topping is straight on top.
Add Blue Chatterer feather cheeks.
Tie in horns and shape them with your fingernail to follow the shape of the wing and topping.
I like to tie the horns as close to the topping as possible and check that the angle is symmetrical from the top too.
Wax you thread well and make the surface of the head as flat as possible without adding too much bulk. If the head tapers too much it will be very hard to wrap the hero over it.
Wrap the hero from front to back so that the barbules naturally face forwards.
Fasten the herl to the base of the wing and make a finish the fly to the same point. Moisten the herl head and turn the barbules back over the thread wraps. Carefully cut the excess with a razor blade or sharp scissors.
When the herl has dried a bit brush it to separate the barbules. Carefully add couple layers of varnish to the front of the head to finish the fly. you can also use a marker to color the head black or use black varnish in one of the layers.
View from above of the finished fly.
Finished Nepenthian.


Posted on Leave a comment

Making simple things from quality materials

You know how nice and easy it is to tie flies from quality materials. They just make things very simple. Now days when I see quality materials that I might have use for somewhere in the near future I buy it right away. Even if I still have some of the old left. Bucktail, saddle hackles and Templedog are always on my shopping list as they are hard to find at highest level of quality and those materials I use a lot. I can tell you that it hasn’t been easy to finding “the good stuff”. Sometimes it feels almost impossible. Thankfully it seems that fly shops are stepping up on this subject. It seems like the quality of the product gets more attention then before and that’s a very, very good thing! Even though many suitable materials for example for my tubes aren’t expensive, I will always put in a few euros more for quality. It pays to do so in the long run.

Quality stuff = fun times at the vise

Now to the subject and enough of the “bitching”… Even though I like to use quality stuff, my fishing flies have become simpler and simpler. Simple flies that move well and have a clean look to them are my thing. Form follows function.

A form that works
A form that works

So does this mean I will throw flies that look like they were tied by a 5-year old? Maybe, but at least I’m using quality materials to make them☺ . I just like to strip out all the non-essential stuff out. I follow a three step “rule” on the flies that I tie:

  1. The fly must have a shape and form that the fish like. That’s rule number one. Even if a fly looks kinda funny to a human eye, it’s the fish that matter.
  2. The fly must be as foul proof as possible. Remember, good proportions and taper makes a big difference in this. So does material choices.
  3. The fly must be tied well no matter how simple the pattern is. That’s a big confidence factor.
A good underwing is the key in making this type of tubes
Simple, but still quite beautiful?

I’ll be back with some tying instructions on these “Simpleton” flies and maybe even a vid or two.

Ps. If any of you have some ideas on color combos for The Gaula I’m all ears. I’m heading that way in a few weeks. Use the comment form below!

[fbls]

Posted on Leave a comment

Classic salmon fly show case

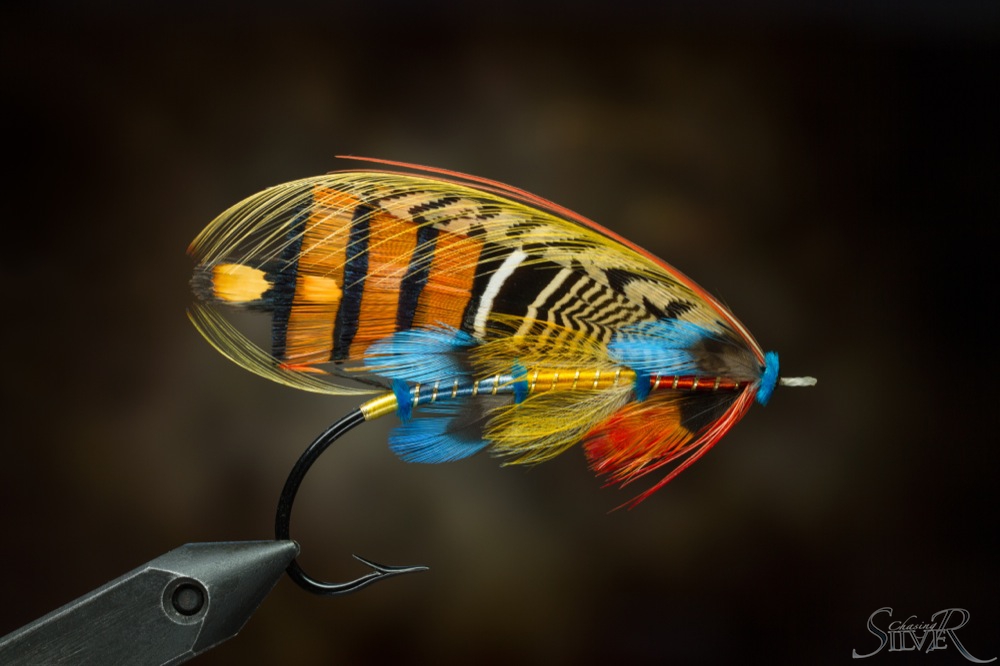
Here are some photos of a collection of classic Salmon flies tied by Mr. Toni Kakkuri. Toni is an internationally recognised Finnish fly tier. Unfortunate he doesn’t compete anymore, but he still ties flies for his living.

Back in the days of attending fly tying competitions Toni won a gold medal in the World Championships, two gold medals and three bronze medals in Finnish Championships, and from Irish Open he gained two golds, four silvers and two bronze medals. As an icing in the cake he belongs to the FQSA fly tiers Hall of Fame. In addition to being successful competitor Toni has been judging in the FQSA World Championships of fly tying – the single European ever nominated for a judge position. His web page is at www.kakkuri.fi. Have a look (and use Google translator to encrypt Finnish J).

Enjoy the beauty of the Classic Salmon Flies!


[fbls]