Posted on

More Than a Hobby

While now Im sitting in my couch, arm firmly wrapped in after shoulder surgery, I have time to think my salmon fishing career. As many of us maniacs, also I, started on a very young age. I still can remember my first touch to that fish that affected me permanently.

I was in River Teno with older guy from our family. He is a Teno-veteran over more than 50 years and one of the salmon anglers that I respect the most. He still do harling and fly fishing, even though he is 70 years old. Tough guy! Anyway, that time he did harling and we started our first run with three rods, all of them was rigged with traditional Teno flies, in one of the best pools in middle Teno. And it happened right away! Fish on and as I was a rod-guy I had a chance to play with the fish and reel it in. I was so happy when we got it in to the boat and she was laying in bottom of that beautiful wooden floor. It was totally fresh atlantic salmon around five kilos! I still could remember it like a yesterday even it happened 21 years ago, I was thirteen at the time. After that moment I was hooked.

Tiirasaari

Year after I got my very first salmon rod and reel. I had tied some flies during winter and was ready to go when season started. It was a hell of a job to learn to cast with long, double-handed, rod even though I had fished trout with fly for few years. That big rod had some balls and I loved to cast with it even I was really poor in it. I still love those 15 footers and only use them. I know, it would be maybe easier with shorter and lighter rods but I dont care, 15’s is my thing. Salmon fishing was really hard in those first years, and it still is, but I managed to land few fish. Not big ones but grilses and medium size salmons with my own flies and it was the starting shot to this madness.

Shortly after those very first years I started to fish some other rivers, mainly in Northern Norway and I  was deeply in love to this sport. It felt so special to go fishing trips with older guys, hear them telling tales from the old times and so on. I loved the nature up there and everything involved! In one of those early years I realized that salmon fishing is so much more than catching the fish. The more years have passed since the feeling is strenghtened!

Nowadays, after a long winter that feels longer and longer every year, its so nice to sit on the bank of some great salmon river and only enjoy the summer and relax. Salmon fishing had come more than a hobby, its a passion, a lifestyle! On winter time I spend hundreds of hours in front of my fly tying table, watching old photos and dreaming about summer. When it finally comes and you meet good old friends at the opening of season its like dream come true! Dream that come true every year, its very special.

Over these years I have been so lucky and privileged to fish in some of the best Atlantic salmon rivers in the world. Every of them are great on their own way. One way its refreshing sit on the bank of Royal Dee at beginning of February in middle of snow storm and on the other hand there is some magic those July nights in long river boats in Northern Norway when sun is shining all night long. As much these, I love the excitiment of opening night in River Orkla. Not to mention that feeling of what it is when I sit my own terrace after sauna, beer in my hand and listen and watching when big salmons are coming up in to the Mighty Teno!

This lifestyle have gave me a lot of great friends from different countries and social classes, not forgetting those guys whom I started. Even though it takes a lot of my time and almost all of my money, I wouldnt chance it for anything. By the way, I still fish in The Great Teno, every summer and nowadays I have own little paradise up there. Hopefully that majestetic river will return its former glory with new rules at the near future! Fingers crossed!

River Tay Spring 2010 016 2013-08-06-266 Orkla-Driva-Tana June 2010 091 OLYMPUS DIGITAL CAMERA

Posted on Leave a comment

Not a Smallest Chance

Sometimes when you hook a big Atlantic Salmon you know right a way you gonna have big trouble’s to land it. This happened to me at Alta this season…

I was fishing Elvestrand beat and Gammelplassen pool at best time of year. 10th of July. We had a group of three, Timo the license owner, John Vegar our friend, and me. We have had one round per guy one pool above and I knew it was my time to start when we drove down to Gammelplassen. Water level was 1.5 feet above zero so pretty good to whole Raipas. When boat glided over the pool I wasn’t so sure do we have a good chance here, water seemed to go little bit slow. John Vegar who is local and also guiding a lot in river said that Gammelplassen should work very well at this water level so I didn’t have reason not to believe him. He is usually right when speaking things like this.

I had just rig up new leader, quite a short one from Stroft Gtm 0.50mm and big 15cm Strömsö-tube fly. I was testing my new G Loomis line which have intermediate belly and sink 1 tip. Just a while ago it had worked pretty well in this kind of current. I started to fish from bank just where Gammelplassen starts. Stream isn’t  special in any way here but as many pool in this river, Gammelplassen is famous it’s big salmons.

Right away when I had enough line out I fell pull in my line but couldn’t hook the fish. Next cast and same thing. I was thinking what a hell! I test my brand new VMC-treble hook and it was razor-sharp. Hmmm.. Its only me fishing this pool and boys are enjoying their beers so I gonna take two steps upstream and try one more cast I was thinking. Next cast gave me small pull in same place, like a grayling but I release my loop and fish was on! And not a grayling! JIIIHAA!!!

Right a way fish took 20-30 metres long run to upstream and jump. Oh f… it was huge! Over 15, probably +-20 kilos and fresh straight from Alta fjord! It stopped and in same second I understood what gonna happen next. It will go to where it came from, to Arctic Ocean. And poor me, I was right. I tighten up my drag from K Rowland reel, which have very powerful cork drag, but salmon took longest run what I have ever seen. When I understood it will take all my lines I tightened drag one more time. Now I was able to give really hard pressure to that fish. But nothing happened it just swam downstream like a crazy and I was running after. I shouted to John Vegar that we have to follow it with the boat. He was ready and engine was running so it was all up to me was I able to run fast enough to the boat and have a chance to follow this monster. When I was close at boat John Vegar shouted to me: “ There is big tree in the water, don’t let salmon go there!” I was only thinking, what can I do if salmon want to swim to that tree. In this point it had 200-250m line out so I knew I don’t have any control to it.

So I ran and ran and swam a little bit between, heh heh, 100m distance to boat felt like a kilometer. When I was next to boat and ready to jump in I felt that which I was waited last minutes, everything was over. Nothing special happened, hook just went off. I was mad to myself when I was reeling in my running lines and backings. Second year in a row when I hook fish probably close to 20kg and lost it. But to be honest this time I wasn’t even close to land it. Salmon was driver and I was passenger.

As this short film from Timo Maunumäki shows, salmon fishing  is all about feelings. Joy, happiness, excitement and much more, sometime despair and sadness, hah hah. Now when Im writing this I can think back those nice moments at that sunny day with smile in my face. Alta gave some consolation prize’s to all of us later that night so have to be happy to that… This time 😉


Posted on 1 Comment

Put some brake on that sucker!

The sentence on the headline was said to me by a great teacher and friend on one of my first saltwater trips and it has ever since echoed in my head when I’m playing a fish.

Even though there is a big difference in fishing for saltwater predators like Tuna, Tarpon or Sailfish to fishing on the river for salmonids, the same basic laws of physics apply for salmon too.

If you’re in the gym riding an exercise bike and turn more resistance on it, you will tire faster than if you just let the bike run free, right? The same thing works with fish. If you apply steady resistance on a fish it will tire a lot quicker to get your hands on it then without resistance. A no brainer, right? The emphasis is on steady pressure. Don’t jerk around, it will only lead to pissed off fish and broken leaders.

So, how much is enough pressure and how do you apply it? Setting your drag on your reel is the number one thing to do. A good drag setting for different salmon species on a river is something between 800 grams to 3 kilograms. 3 kilograms being a pretty extreme setting on a river as bad things usually start to happen when you’re hitting that magic number. I am not personally comfortable using reels that have less than 2,5 kg of drag even for river fishing. A quality reel with a good drag is just so nice to use and a powerful tool to fight a fish!


One of my quality reels with a solid drag


If you’re fishing with small flies and thin leaders you are limited to the lower end of the drag spectrum. Also smaller fish like Atlantic salmon grilse and pink salmon have a very soft, small mouth that does not take a lot of force to rip. If you’re using thick leaders and strong hooks you can pump up the volume. Remember to set the drag tight enough right away. Don’t let the fish run that first crucial run on a light drag and take an excessive amount of line on the water. A “dog” is always easiest to walk on a short leash.


Grilse
Grilse


Pinks have soft mouths


A successful "Dog" walk
A successful “Dog” walk


Also things like rod angle affect the resistance and depending on which line you use the friction from the rod guides. Don’t overdo it but remember to put the brakes on them, especially if you are releasing the fish. Nothing more of a sad sight than watching a fish “drowned” to its last breath and then trying to revive it. Much rather lose a fish mid fight then kill it unintentionally on a prolonged fight. When compared to saltwater, fighting a salmon on the river is not as straight forward. Positioning yourself on the river bank and playing in different kind of currents give the fight a different tone. But still, I urge you to put some heat on the fish. It has worked wonders for my landing percentage, even though I’m not that bothered with things like that anymore. The important thing is to return the fish in its prime back to the river (that is, if it’s not going to the smoker) and to have fun in the progress. Even though many, especially in the Atlantic salmon fishing world don’t believe in it, putting some break on those suckers have worked for me on all 5 species of Pacific Salmon, Steelhead and of course the mighty Atlantic Salmon. Not to mention all the saltwater species that I’ve fished for. Not saying it will necessarily do it for you, but give it a try…

Have fun and catch a big one!


Posted on 1 Comment

Happy Holidays

Some years back I managed to land quite a large Atlantic Salmon from northern Norway. When I got back to the bank, it was measured 129 cm in length and we weighted it in a C&R sack. This kind of sack is very good, because it weights almost nothing, even when it gets wet. It is very easy to pack to the fishing bag and it doesn’t hurt the fish. The salmon was a female, bright one with a marks from the sea lice. I was totally amazed because I never believed, that female of that size can even be true.
Anyway, I had a Salter´s spring scale up to 20 kg, which is very sharp and a good scale. When we lift the salmon up with a bag, the Salter went down to the bottom, and didn’t move at all. It was totally at bottom. Fortunately my very good fishing pal Aki had his digital scale in the car. That one was able to operate up to 25 kg. We lifted up the salmon with Aki´s scale, and scale showed figures from 20,6 to 21.7 kg´s. We decide to go with the lowest weight and let fish go back in to the river. I can tell you, it was really big female salmon…
Of course it is still my personal best, and in this life, there must be all the odds with me, if I´m going to break that record. Since the salmon was released I decided to order the reconstruction of it. We had a very good pictures and very precise measurements, and here in Finland was one guy who works with these. He promised to make a trophy for me.
 When this guy called me, and told that my fish was ready and shipped, I started to tease my wife about the hanging the fish on our living room. My wife doesn’t understand at all why someone would hang animals on their wall, so I was decide to play with her in this case. One morning I received another message this time from the shipping company, that my fish has arrived. I jumped to the car and drove to the their office to pick up my trophy. It was packed in to a large cardboard box, and it was filled with a newspaper and the bubble plastic. I carried the box to my car and it was so big, that I had to fall back the back seats. I drove back home where my wife and a son were sitting on the terrace having a breakfast. I jumped out of the car, and like a little kid with his new toy, started to rip out the fills.
I took this huge trophy to my arms and with mighty proudness I showed it to my wife. She looked at me with a very strange look in her face, stood up from the chair, opened the front door and said: ”Never”. She then stepped in to the house and closed the door behind. My son looked at me with a question mark on his face and I just stood there and felt very stupid. As you may have guessed I never placed the trophy in our living room. Instead, it hangs on the wall of a Finnish fly fishing shop Helsinki Spey Clave.
Just arrived to Helsinki Spey Clave
With this odd story I´d like to wish Merry Christmas and a Happy New Year to everyone. And remember:  we must save the salmon, nobody else will save it for us.
Yours, Truly
Miki
Posted on 1 Comment

Pompero – step by step

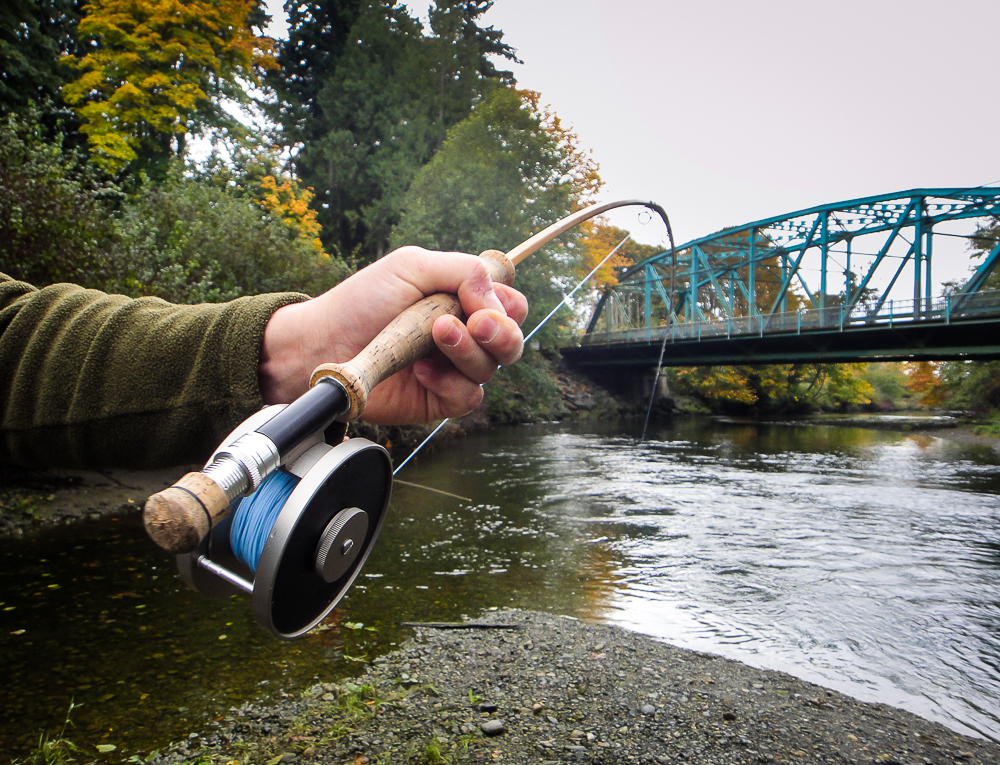
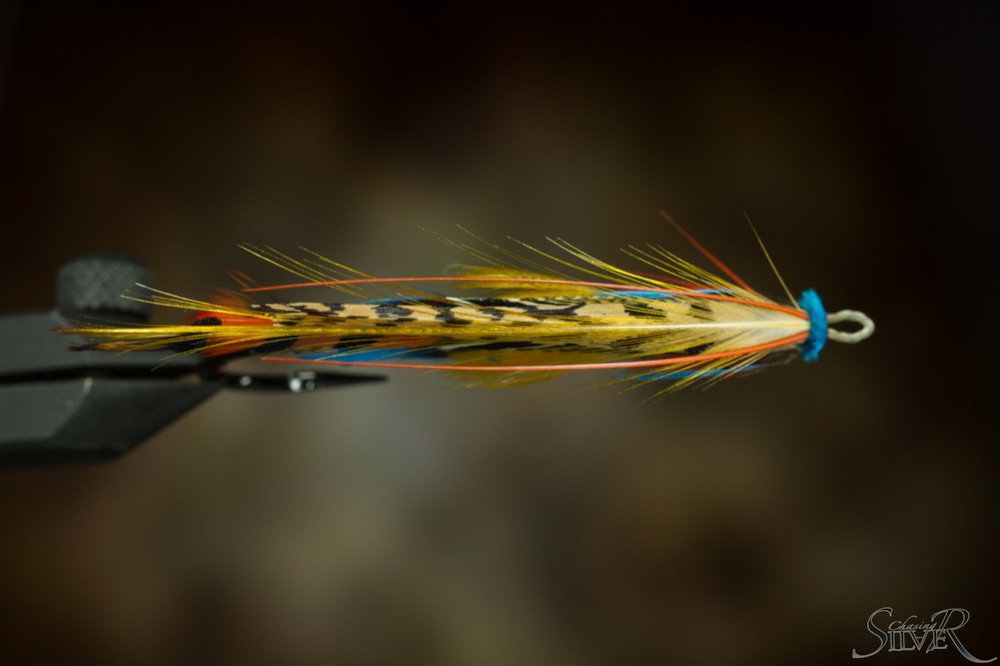
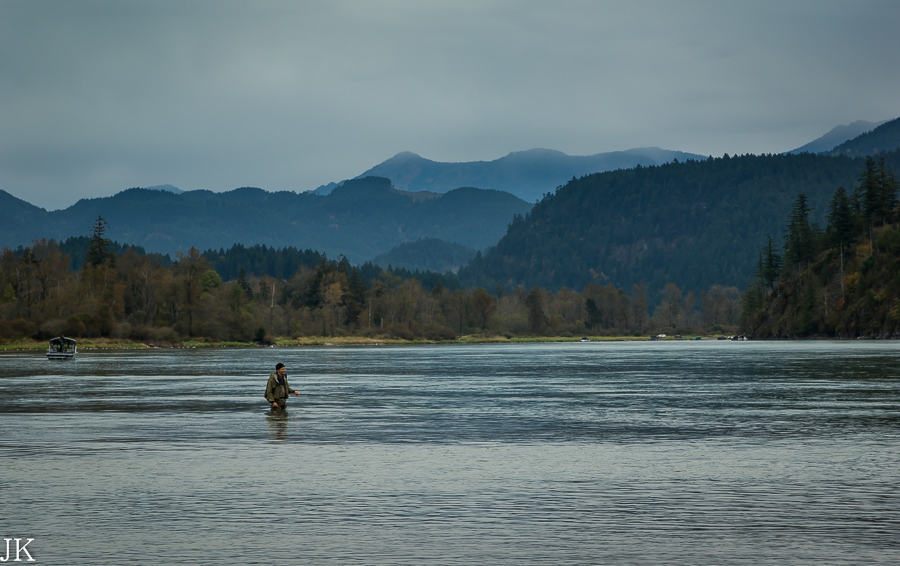
Chasing Atlantic silver with dry flies is my favorite thing to do and also by far the most effective way to catch the fabled salmon for me. And my favorite dry is a Finnish specialty, Pompero. It has a lot common with Bomber, but there are some key elements that differentiate Pompero from its more famous American cousin.

The fly was originally made famous by Heikki Anttonen, who is now a days known in the smallish Finnish fly fishing social media scene as Mr. Pompero. As usual, people have adapted the fly to suit their style of fishing or just to please their eye more, and I’m no exception. This is the way I tie Pompero, and it has been very productive for me. But for example my dear fishing buddy ties quite many things differently and catches even more fish than me with the Pompero (and with any other fly for that matter), so I’m pretty certain that it’s less about the exact details and more about the way you fish the fly (of which talk more about in my article on issue 4/2014).

As you can see, I’m not such a skilled craftsman as some of my colleagues here in CS blogosphere, but for the fly to be effective it doesn’t necessarily need to look pretty for human eyes. Anyways, here’s the way I do it.
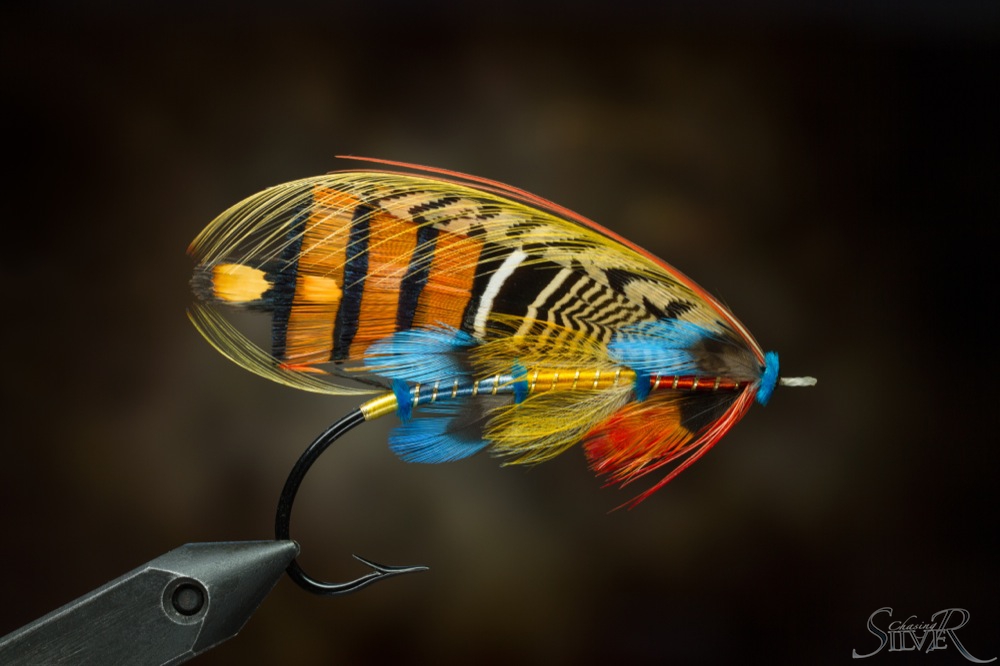
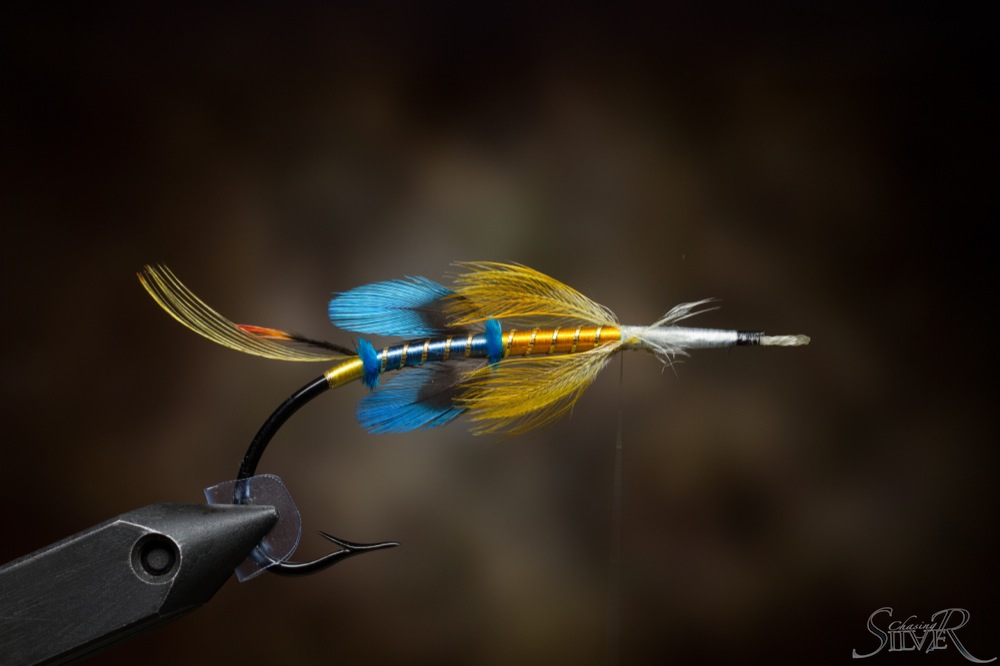
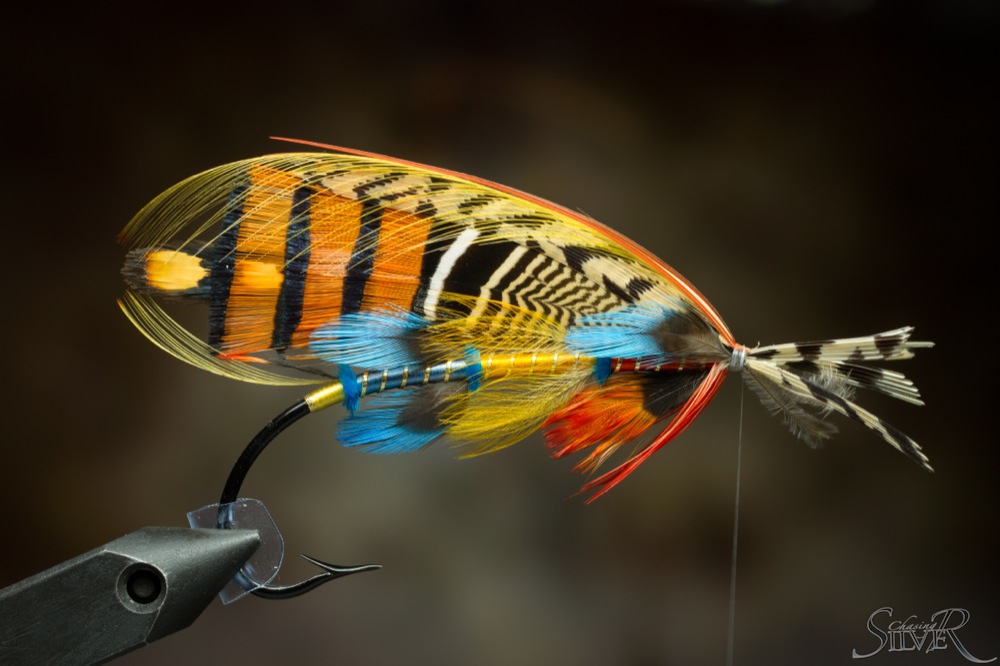
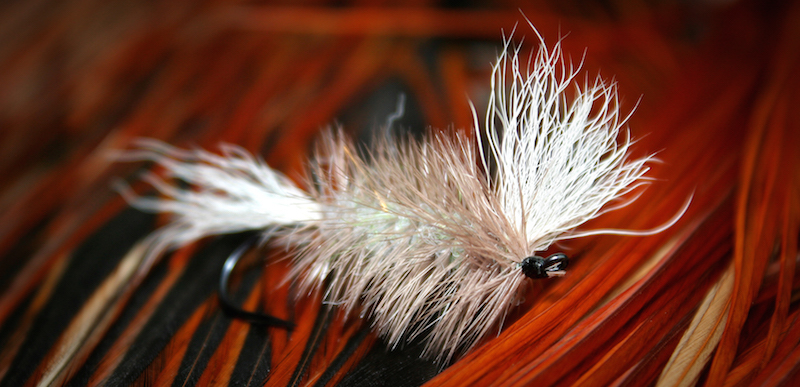
 

Pompero

  • Hook: #4 TMC 7989
  • Thread: Black
  • Tail: White calf tail
  • Body: Grey polypropylene, shaped as cigar
  • Hackle: Dun
  • Wing: White calf tail
  • Head: Thread

Pompero is quite an simple fly to tie and you can do without a lengthy list of materials often required for more classical patterns. Basically you need just a hook, some calf tail, polypropylene and a good quality hackle.

Matsku


Hook

My standard choice of hook has lately been TMC 7989 in size 4. It has quite light wire, which makes for a nice high floating fly but is lacking when fighting the big fish. The size 4 has a little thicker wire and so far I haven’t lost a fish because of the hook (though they really haven’t been put to test with the biggest fish in the hardest places), but especially the size 6 feels just too light for me, so I’m still looking for the right hook for smaller Pomperos. Right now I’m using TMC 5212 terrestrial hooks for them, but lost a few fish because of the hook last summer, so I’m not completely satisfied with it.

Another good option is Partridge’s CS42 with the standard size being 6 (it actually makes for a slightly bigger fly than #4 TMC). It has been proven to be a truly durable hook. Downside in it is that the point of the hook is really short and it wears out when sharpening the hook. Good thing with dries is that you don’t have to sharpen them so often, since they’re not hitting the bottom.

I also know few people who like to use heavy wired nymph hooks especially in smaller sizes to help when you fight with that 15 kilo monster, but so far I haven’t been willing to make the trade-off with floatability. Maybe that will happen after I lose the first truly big one because of the hook.
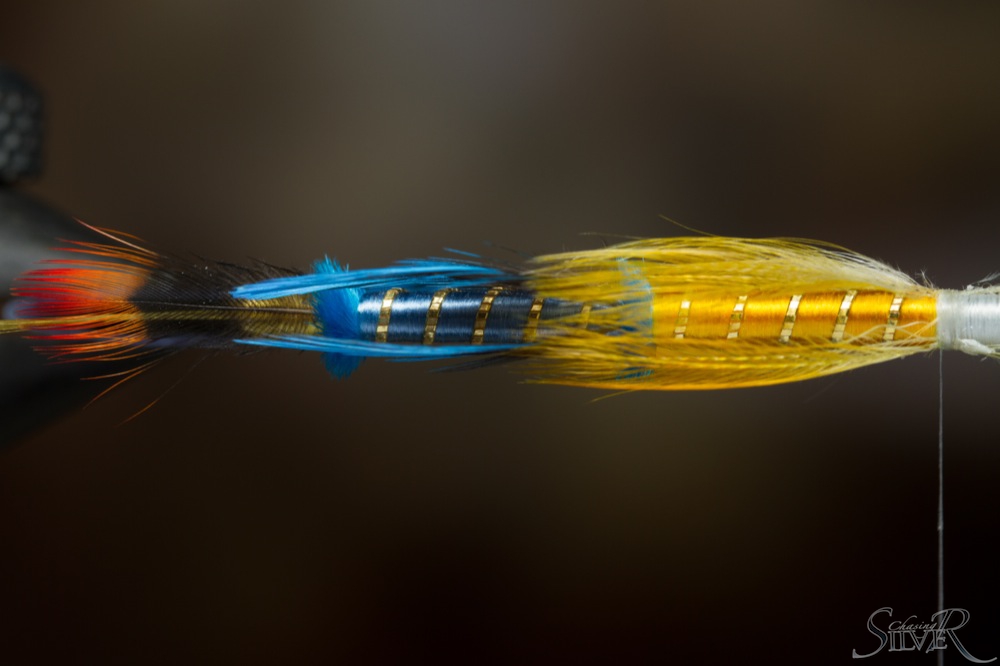
 

Body

I make the material for the body by cutting some polypropylene yard into about 1 centimeter pieces. Then I Pluck and roll the material in your hands to brake fiber and mix it up. I usually mix just a hint of green or red yard into the body. I honestly think it’s more because of a habit than anything that really affects the fishing. This way I can change flies into something a little different if the need arises, but I really haven’t observed any significant differences because of this toning.

You can of course make some more radical changes to colors of the fly for example by adding a hot spot or a belt into the fly. Or you can tie the whole fly in completely different colors. But for me just the basic grey has by far been the most productive color and the standard size 4 grey Pompero is my first weapon of choice in any dry fly fishing situation.


Hackle

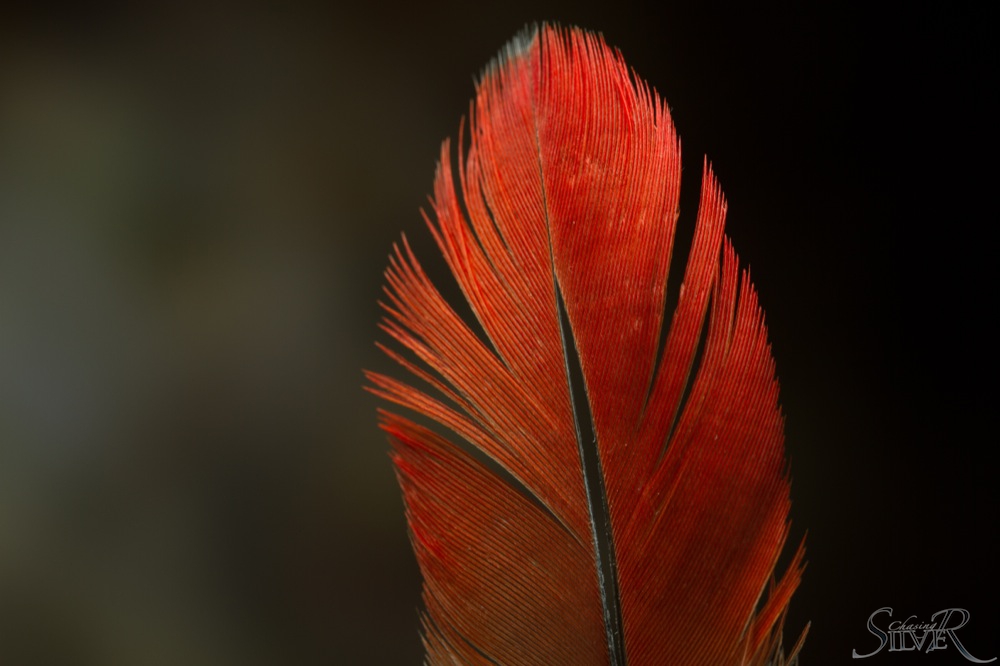
Finding the right kind of hackle is by far the most challenging part of tying the Pompero. The hackle in Pompero needs to be thick with stiff barbs, since the main thing keeping the fly afloat is the hackle. This is one thing that differentiates it from Bomber, which is floating more on its deer hair body.

The best feathers that are long enough (were talking minimum of 15 centimeters here) and have long, but even barbs that don’t taper too much are found in saddles. The best saddles to find these are most often the lower grade ones. The modern saddles have been genetically bred to have optimal material for dries the size 10 and below. This, alongside with the low availability of saddles have made the right kind of hackle material hard to find. Web stores are not much of a use here, since you have to inspect the saddles yourself to find the right ones.

Even the most suitable candidates usually have maybe 10-20 great and another 10-20 adequate feathers. Every time I visit a fly shop, local or one that is new to me, I always browse through their storages of saddles in case I find right kind of material. If I run into one, I immediately purchase it. The last decent saddle I found was two years ago. I’m just happy I’m not tying these things commercially, since it would really be a pain in the ass to be continually searching for the right hackle material.

Right now I have two suitable saddles, older Hareline Pro Grade Dun saddle that is perfect and cost me only 20€. I have for long thought that I have used all the usable feathers from it, but still find a few suitable candidates if I look for long enough. Newer and more expensive saddle is Whiting Pro Grade, but it’s not as productive as was Hareline in its heyday. Too much material for smaller flies.

In case you can’t find suitable material it’s possible to tie the hackle in two parts: first the one for the body and another around the wing. In these cases you might find usable material from some necks also, but generally the best hackles comes from the saddles.


Tying

1
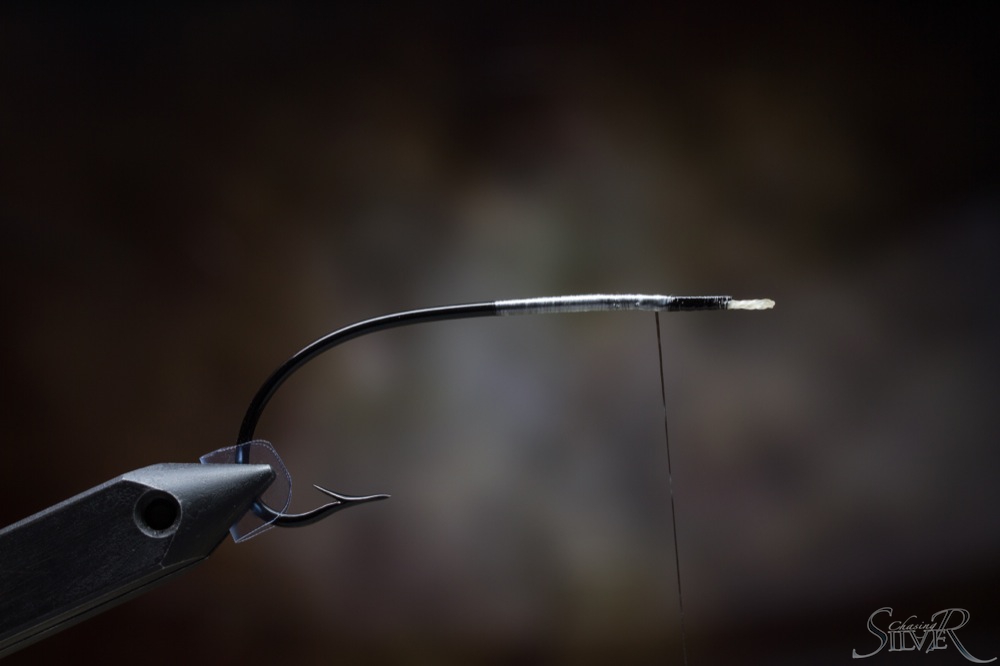
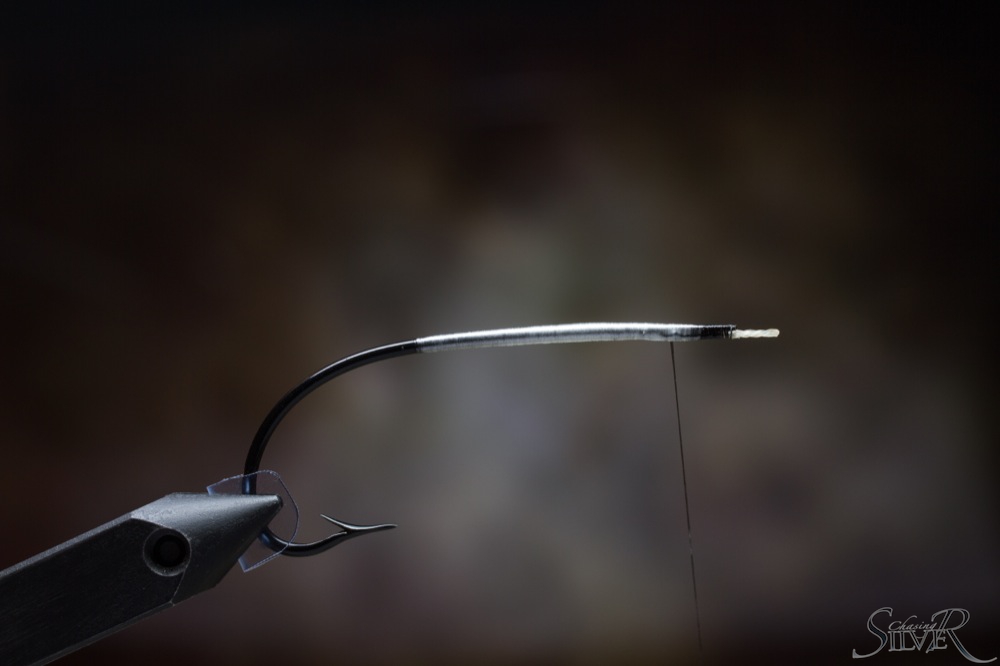
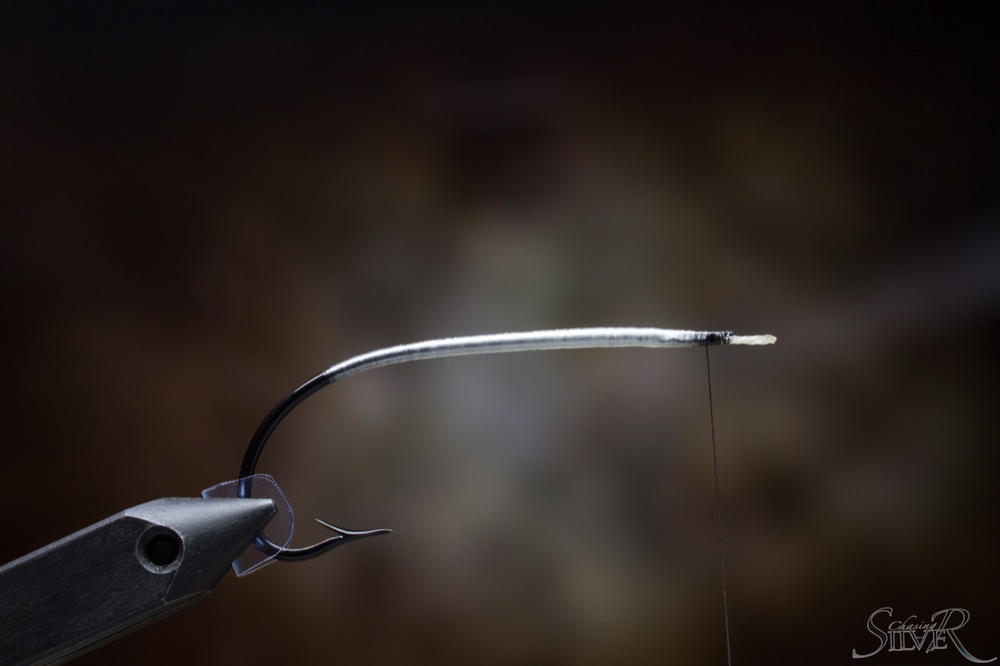
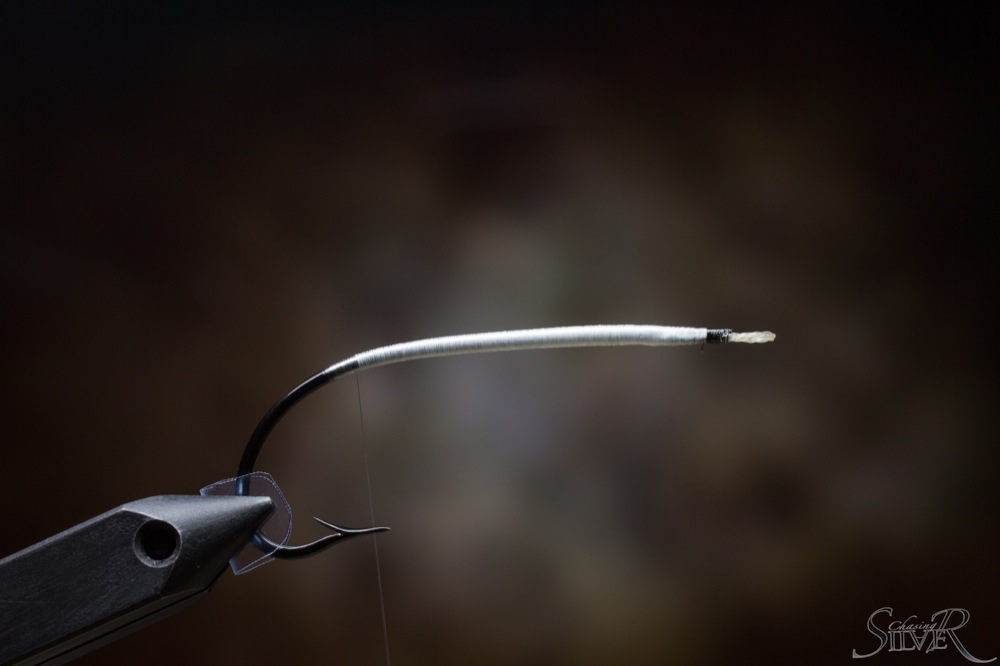
Start the fly by building a nice base with thread. The color of the thread doesn’t matter much, you can use white, black or maybe even some brighter color to make a nice hot spot on the head. With TMC I like to use black thread for the classic looks.

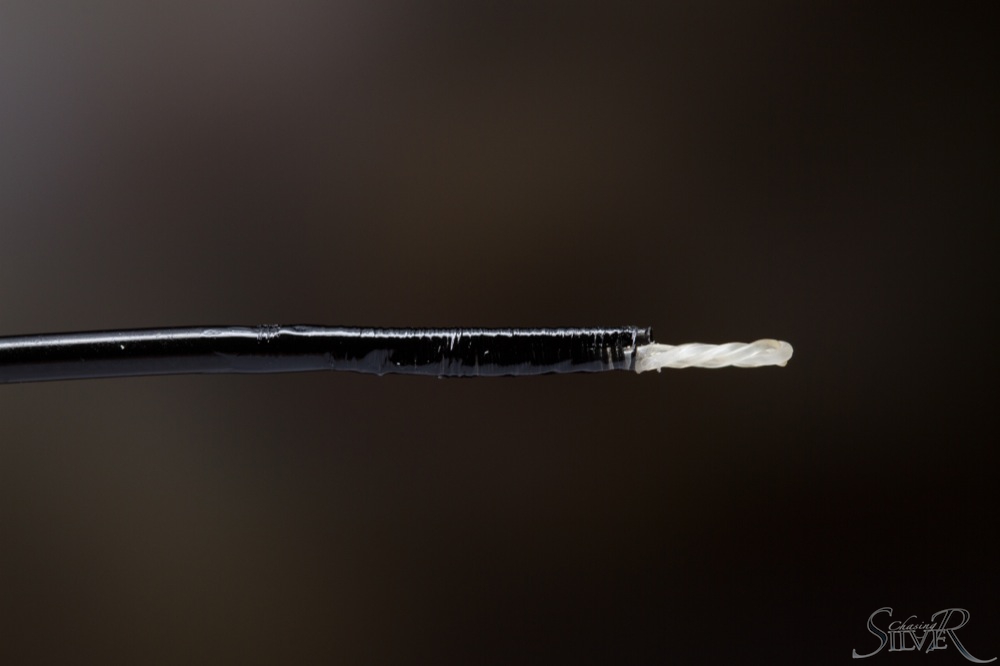
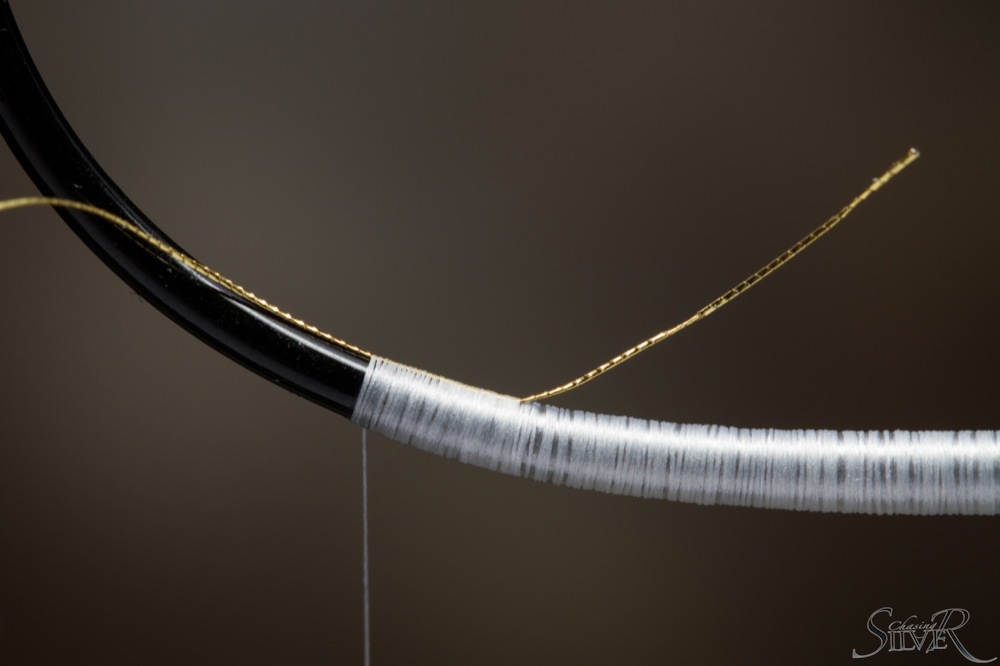
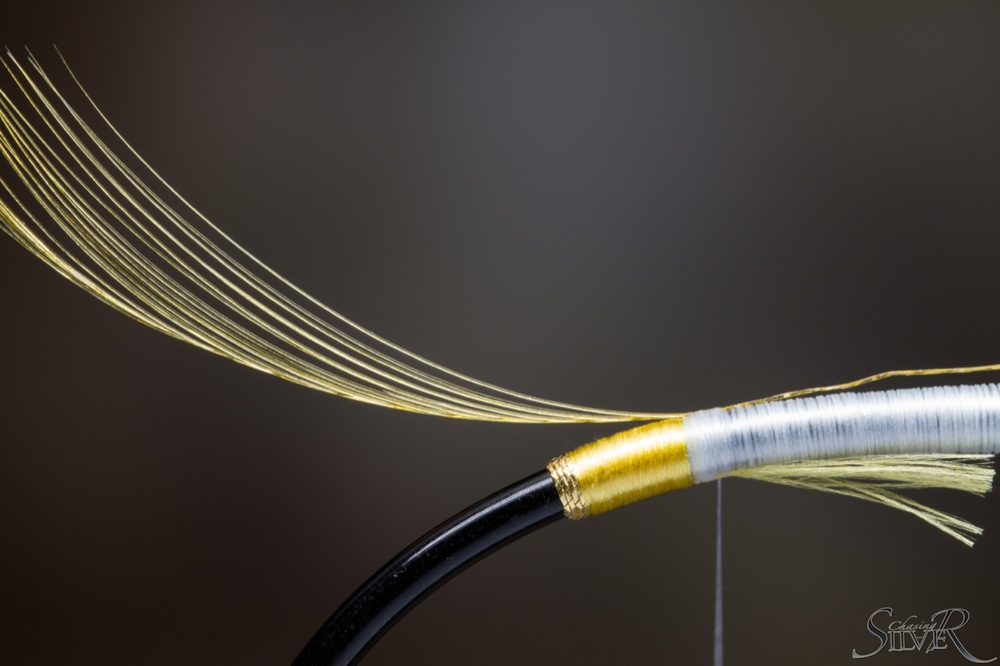
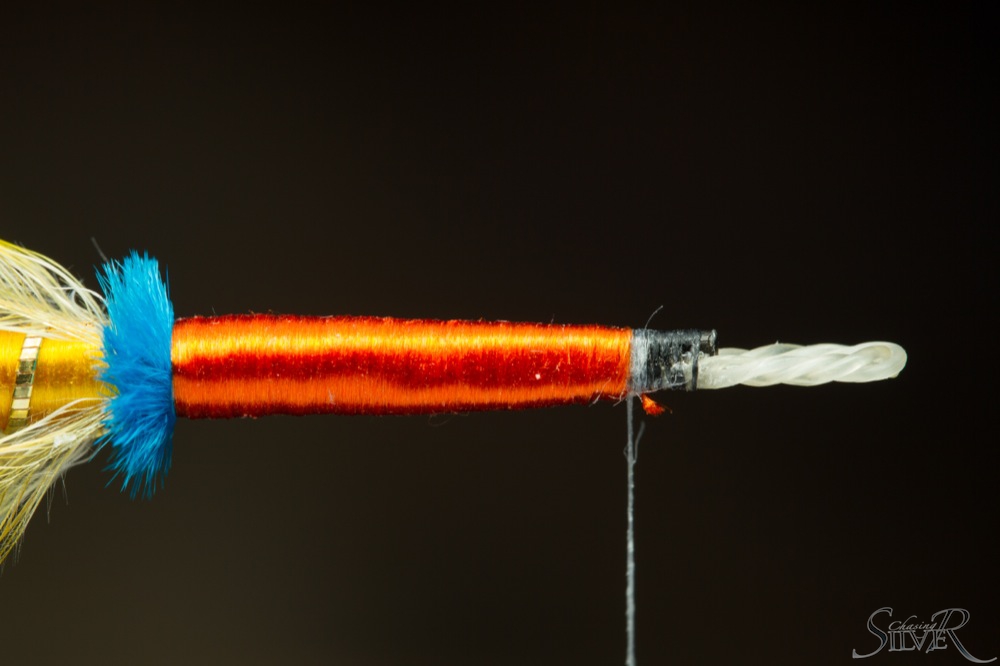
Take a nice bunch of white calf tail for the tail. The tail can be quite thick since it is important part of the shape the fly leaves on the surface. Longest hairs should be about the length of the hook and thicker part length of the body.


2

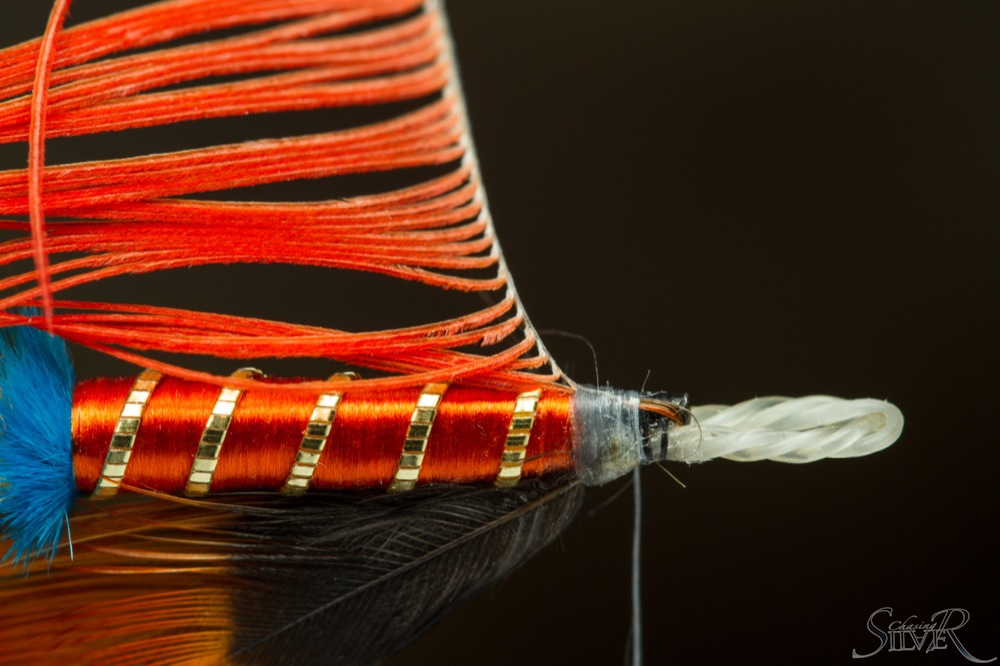
Tie the tail in. Cut it about 2/3 of the length of body and secure firmly with thread.


3

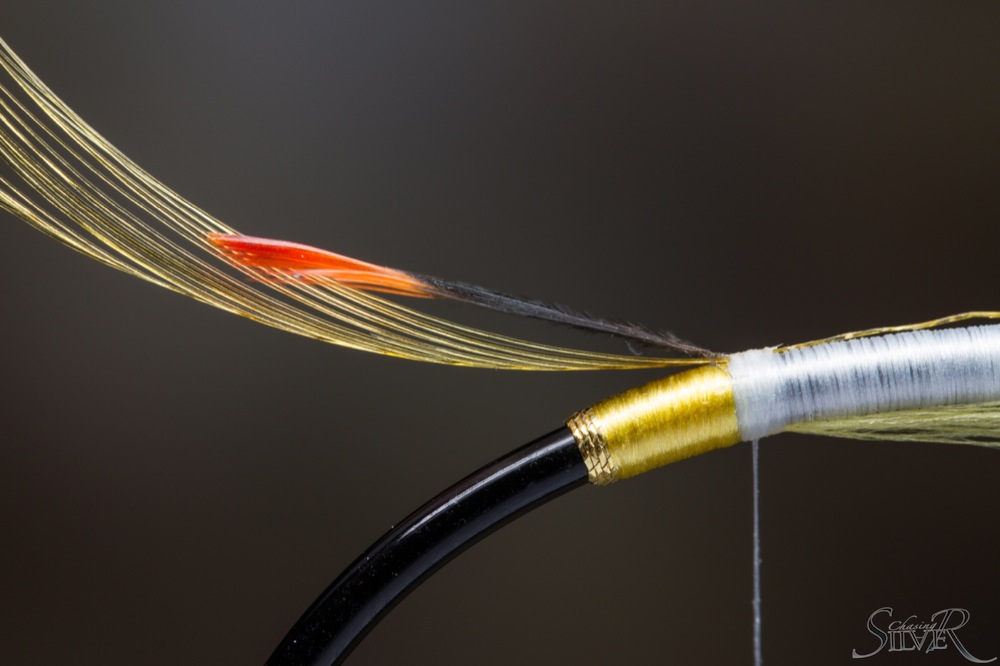
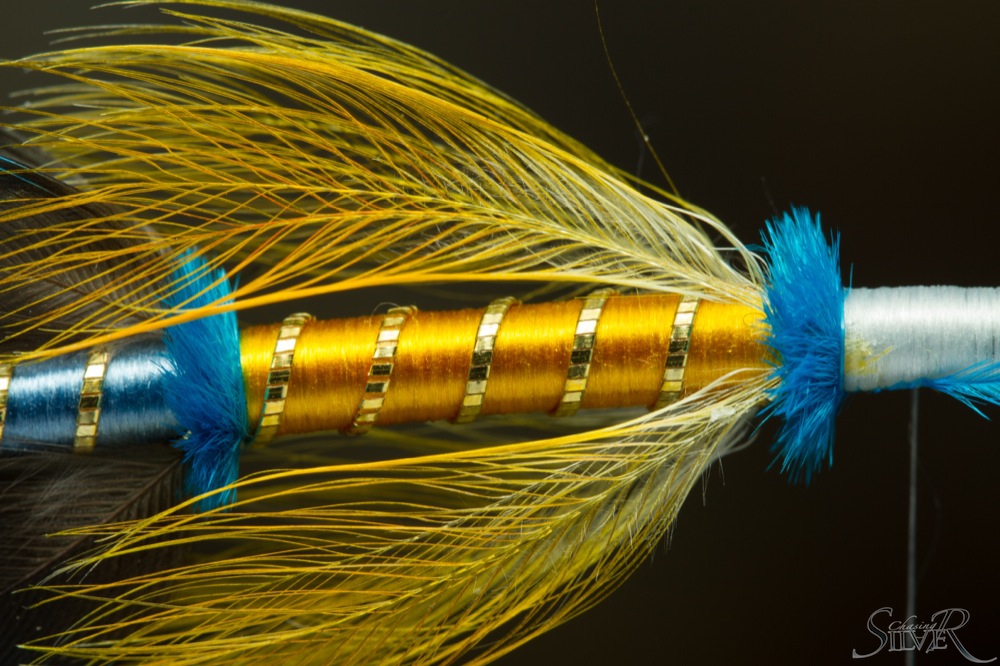
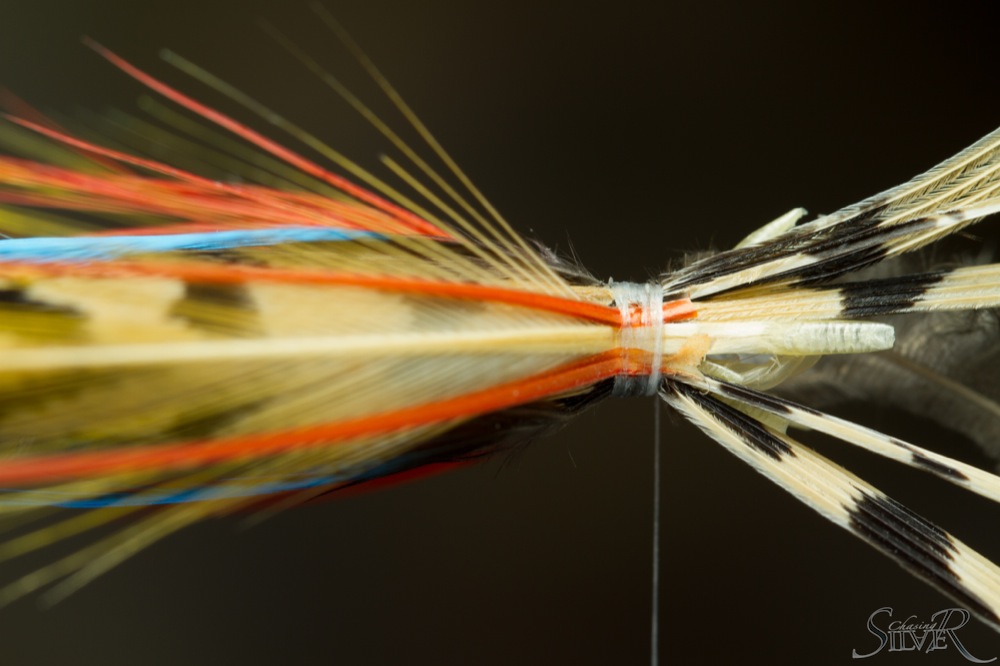
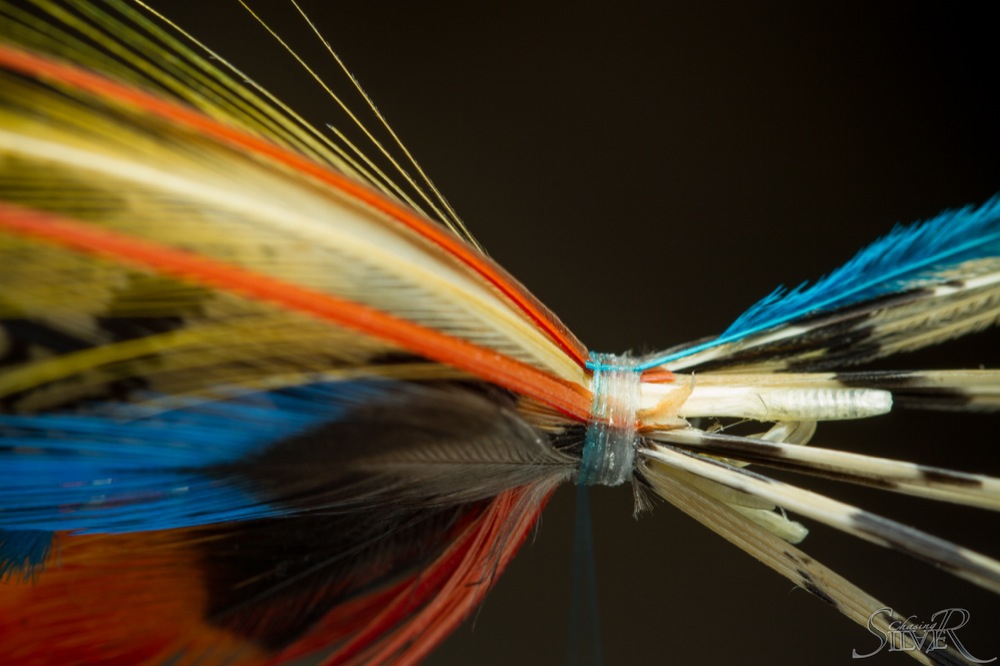
Take a bit thicker bunch of white calf tail for the wing and use hair stacker to make it even. Tie it in and then secure by going towards the eye of the hook with the thread. Leave enough room for a few turns of hackle and a head.


4

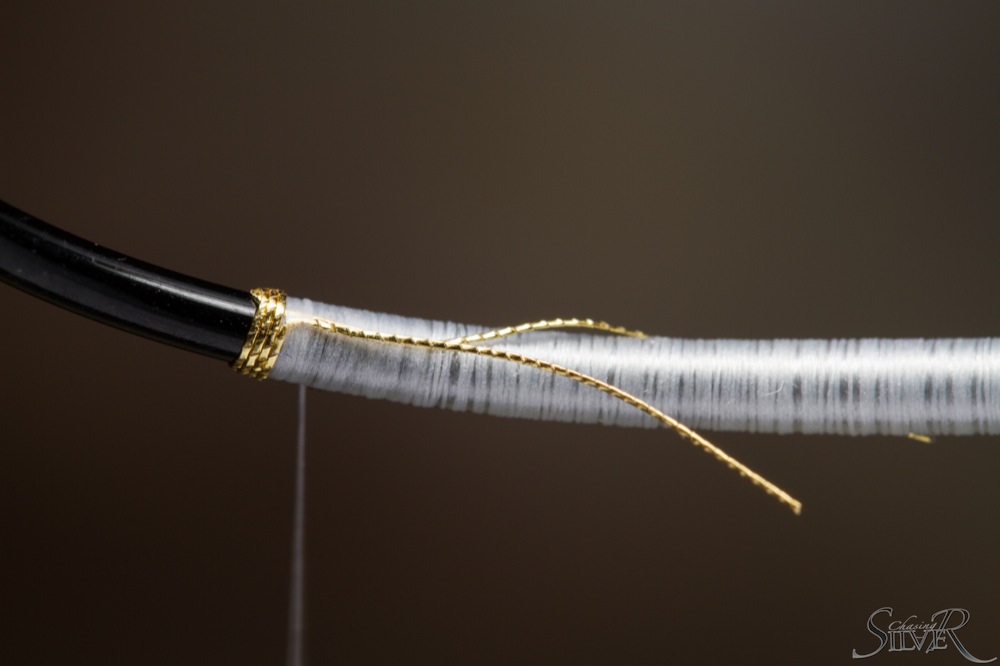
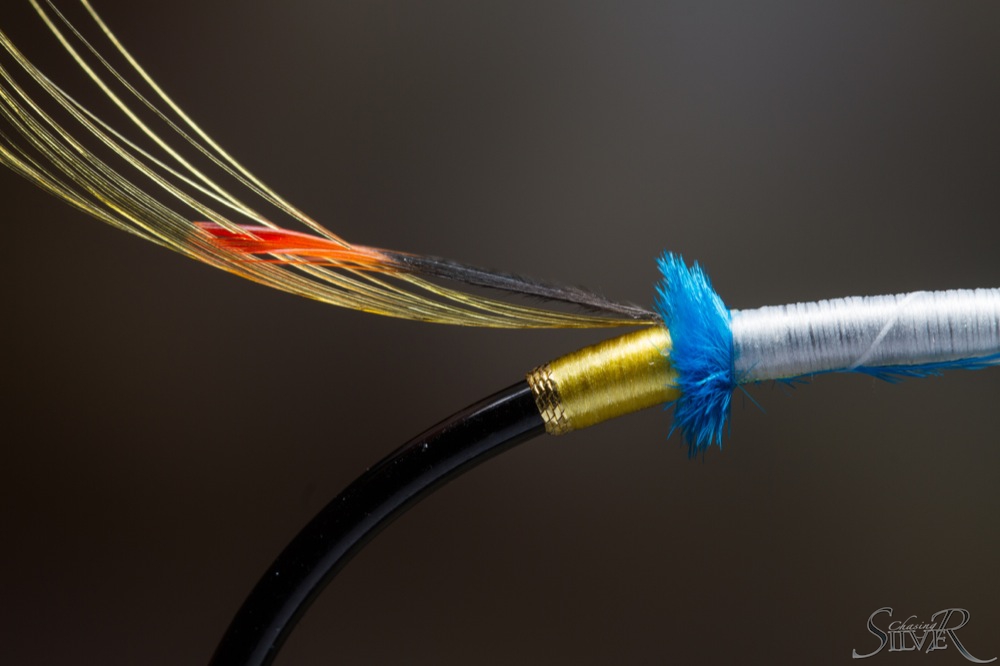
Spread the wing out to form a nice V-shape. Prop the wing up with the tying thread. Then cut the excess material from three different lengths to make it tapered. Secure with thread to make nice cigar-shaped base to build the actual body on.


5

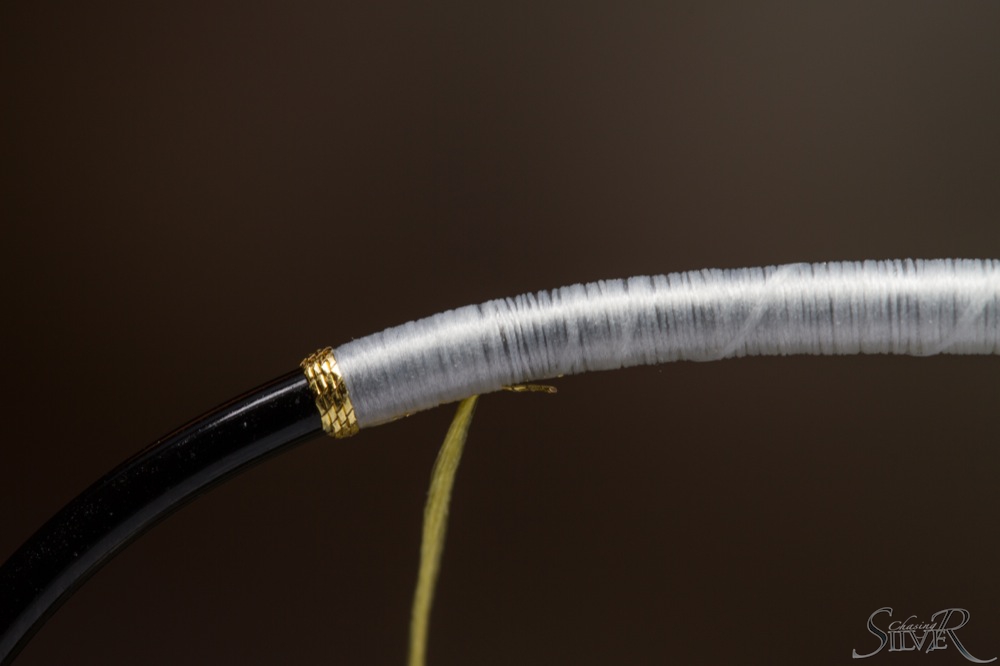
Tie in the hackle from the tip of the stem.


6

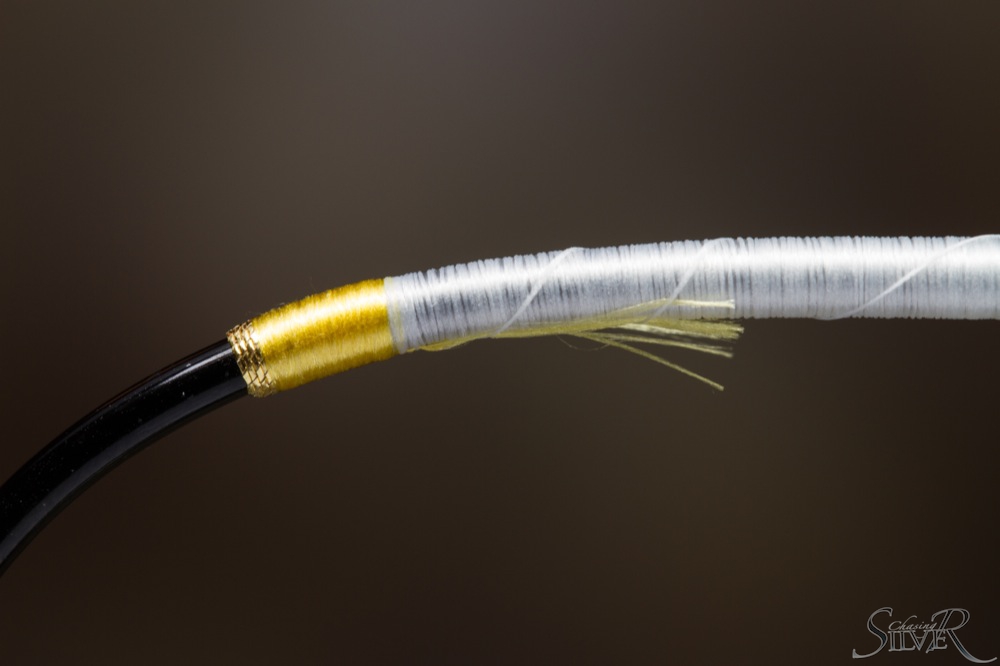
Dub some polypropylene on the thread and start building the body. When dubbing the body I have lately been doing the same thing as Mr. Pompero himself and use this natural wax that is made for leather shoes to keep them dry. It helps with the polypropylene (it can be a bit difficult to handle because the fiber is quite rough) and the fly floats better when you soak the whole thing with the stuff when you’re tying it even if you use floatant on the riverside.

Once again it’s not a necessity, I did just fine without the wax for quite many years, just a small helpful gimmick. I didn’t use it when tying the fly photographed here since it makes the fly look a bit silly and wet before it settles in.


7

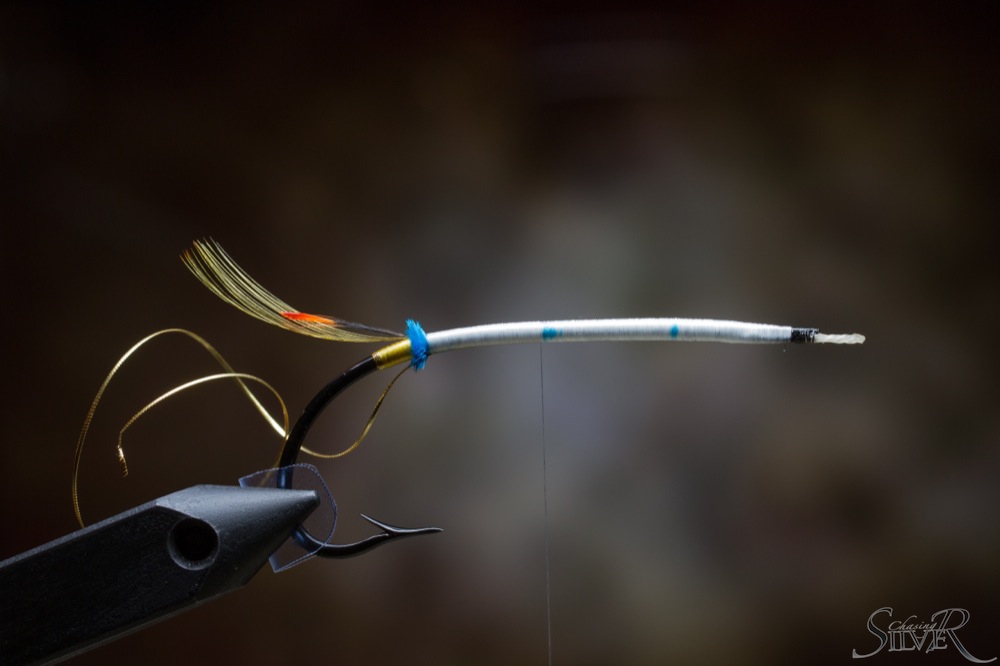
Continue building a nice cigar-shaped body from the polypropylene.


8

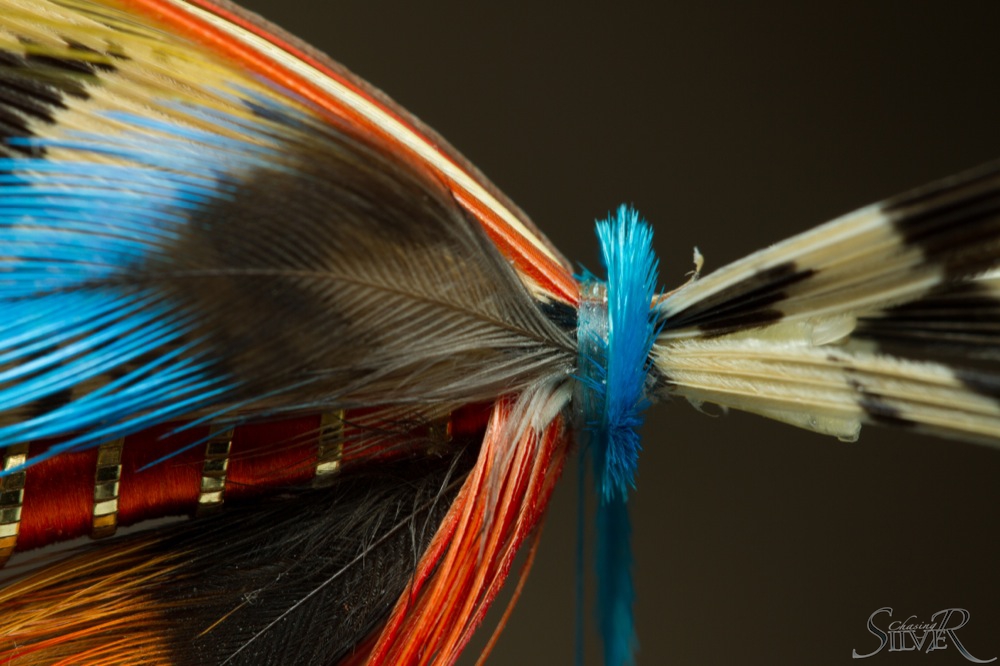
Roll the hackle around the body in even turns. Make the hackle quite thick.

This can be a tricky part, since it’s easy to break the light stem when you start to roll it around the body. Some use thin monofilament line to secure the hackle. This makes the fly more durable, but I’m often too lazy to do this and been doing ok even without the extra reinforcement.


9

Make thicker turns of hackle near the base of the wing. I tend to tie the wing in upright position and then it’s possible to make some turns on the other side of the wing also. You can also leave the wing in Bomber-style forward-leaning position. Then you naturally can’t tie the hackle in front of the wing.

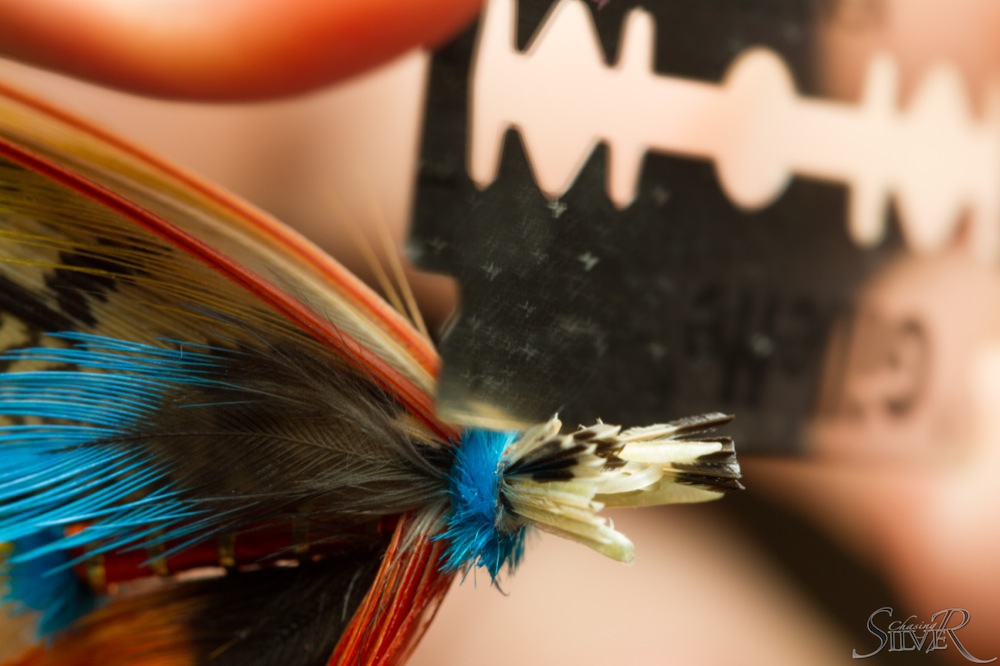
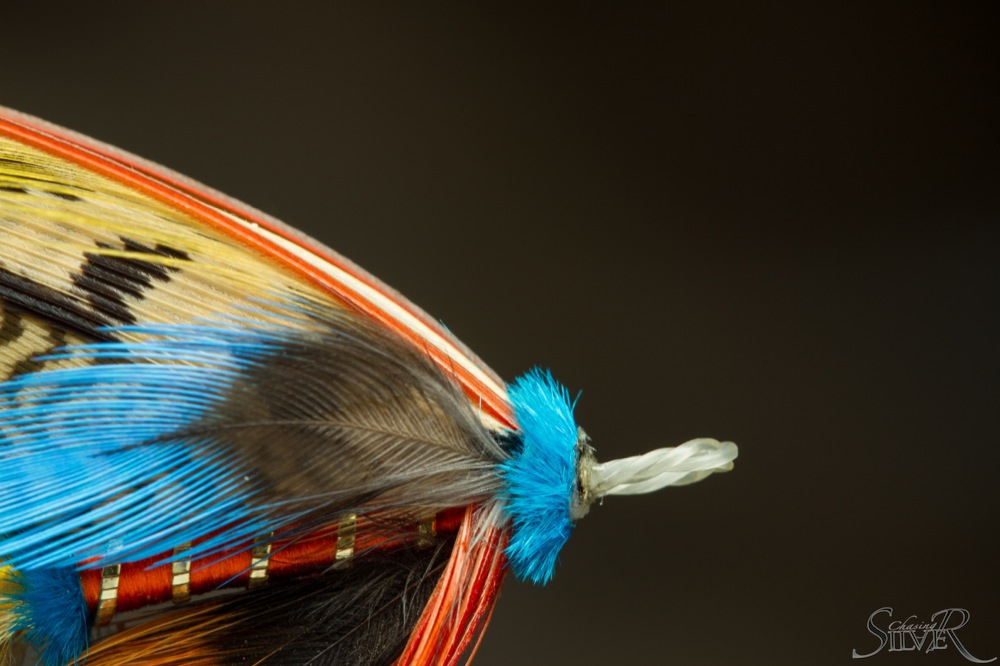
Secure the hackle, form a nice head and use some super glue or varnish to finish the fly.

And there you have it. Pompero is simple yet amazingly efficient fly for Atlantic Salmon. It can be also used for any species interested in dry flies by varying sizes and coloration. For example a slightly smaller Pompero in size 6 or 8 is an excellent attractor pattern for brown and rainbow trout. And it’s a ton of fun to fish with dries, so I strongly recommend to give it a try.


Valmis1_1

Posted on 2 Comments

The Good Vibes photo contest 2014

Did you take a good photo, and more importantly, a photo with good feeling during season 2014? If you did, attend to our contest and win latest Patagonia wading gear! The winner choose to get either

Rio Gallegos waders + Foot Tractor wading shoes 

OR

Skeena River waders + Ultralight wading shoes + Minimalist wading jacket.

Taking part is easy and you’re not required to provide professional quality photos. You are qualified if your photo was shot with DLSR, mobile phone or compact camera. The only requirement is that the photo must be in focus and the subject must be unambiguous. We also hope you provide us the photo with the highest resolution possible.

The photo can represent anything as long as it is related to fly fishing for salmon, steelhead or sea trout. It can be funny, hilarious, gawky, embarrassing. Anything that makes us fellow fly fishermen smile. We look forward to see images with good sense of situational awareness and good mood. If the photo represents a fish of any kind we will give you extra points if the fish is presented in it’s natural habitat – water. We do not want photos of dead or bleeding fish.

The winner will be published in Chasing Silver issue 1/2015, our website and social media. Chasing Silver Fly Fishing Magazine reserves rights to publish the received photos in different media and we will always give credit to the owner.

Send us your photo(s) to office@chasingsilvermagazine.com with subject “Good Vibes photo”. Include you name, email address and phone number. If you have a good name for your photo, include that as well. All photos must be provided to us by 2nd January 2015.

[fbls]


patagonia

cs_logo_leikkaamaton

Posted on Leave a comment

Which lines should I use?

Now that´s a question having as many right answers as there are salmon fishermen.

I’ve been fishing salmon with a fly rod for quite a long time. During the past years I’ve tested hundreds of lines, both factory made and custom made, and from time to time people ask my opinion about which lines I prefer and why? Well, I think these things are never straight forward but with the following words I will share my thoughts about the lines I prefer to use during the salmon season.

The golden rule, that I have followed all these years, is: Choose your line to find a good ”pull” in different pools. When you find the ”pull” you can offer the fly to the salmon with a right angle and right speed. The swing speed. In other words, depth of the pool is not as important as is the strength or speed of the current.

The Tools
Tools.

In june, when the rivers are large due to melting snow and when the water is cold, it is good to slow down the speed of the fly. In most of the cases, we look for pools where the current is slow. Spots where those big first running salmons most of the times stay only for a little while. You need to be very lucky to meet them. In early season conditions I prefer to use full sinking lines. Sure, many times a line with a floating belly and a sinking tip is the right choice. Especially when you want to let the fly stay, or hover, at the same position a little longer. But if you want to control the speed of the fly and get it deeper it’s best to go with a full sinking line.

My favourite sinkers are from Triple-D fly line family made by Guideline. These lines are very easy to cast and with them I’m able to offer my fly to a salmon the way I want. In a pools where the current is strong and “thick” I prefer to use  I-S2-S4 and S1-S3-S5 heads. I use these heads with my Loomis 15 footer and cut them to about 11,5 meters in length. This length equals to about 40-42 grams in weight. Also, a bit older shooting head family from GuideLine, Power Taper, has a few very good members such as S3-S4 and S5-S6 heads. Pools where I prefer a little more speed I like Triple-D heads such as like H-S1-S3 and F-I-S2. Another very good sinking line is RIO AFS S3-S5. It is very easy to cast and I haven’t cut it at all. It works very well in full length.

Choose your line to find a good ”pull” in different pools

When the water gets warmer during the season, I use mostly a floating belly line with a clear intermediate tip. My absolute favourite F/I shooting head is Vision Ace, the older model more precisely, which is not in the market anymore. The discontinued ACE had a mono core and in my opinion, it is still one of the best fishing lines I’ve used during the “normal” summer conditions. I have discussed with some fly line manufactures about the mono core lines and, as far as I understand, the problem seems to be how to make a line with an good casting features with around monofilament core. Sad… Different kinds of polyleaders are also good alternatives to be used at the very end of the fly line. I was in Norway few weeks ago and used clear intermediate tip line with an intermediate polyleader. I think it was a good combination. Floating belly with a clear long intermediate part is very easy to cast and carries the flies nicely just under the surface.

I hardly ever use a full floater. Well, actually, because I don’t like so much dry fly fishing for salmon, I simply don’t have any use for full floating lines. I use mostly tube flies. I don’t want to weight my flies so using sinking lines with light tube flies, more sensitive to the current, with an longer leader makes me a happy angler. This has been my  way to catch those nice chrome coloured Atlantic salmons.

Loading the rod
Loading the rod. Photo: Erno Mäkinen

If I look back on this season here’s what I used: two of my rods, both 15 footers, only a few lines, Triple-Ds which I mentioned earlier, Vision Ace F/I, and one custom fly line made by my dear friend Pepe Linden. A very good line. That line is special… The body of the line is from old Loop or GuideLine intermediate followed by a short section of sink 4 and I use a S2/S3 tip at the end. The line sort of goes deeper and moves slower from the mid part of the line. With this line I can slow down the speed of the fly really nicely without loosing it.

I strongly believe that it’s more important and more productive to chance your fly line than changing your fly. Of course, sometimes, it’s the other way around but I personally use only few models of flies during the season and change my fly line more often.

Have a nice upcoming winter…

Sinking line
Sinking line and a Scandinavian tube fly – job done. Photo: Harri Hilden
Posted on 5 Comments

Traherne – step by step

Related to my article “Major Traherne – Top of the Classics” published in issue 3/2014 here’s a thorough step-by step guide with advanced tying tips and tricks. In the following fifty images I tie one of Traherne’s patterns Nepenthian. All feedback and discussion welcome using the comment box at the end of the article.


Take a short piece of gut, moisten it to make it softer and fold it around a stiletto to form the eye.  Tie it in underneath the hook shank and add a layer of varnish to secure it.
Take a short piece of gut, moisten it to make it softer and fold it around a stiletto to form the eye. Tie it in underneath the hook shank and add a layer of varnish to secure it.
Start building an underbody with 210 denier UNI-Nylon or similar flat thread.
Build a taper by going back and forth with touching turns of thread. First turn in the middle of the shank. Second 3/4 of the shank.
Last turn all the way at the back close to the point of the barb.
Burnish the underbody with a smooth object and attach your tying thread to the front and bring it back to about the point of the hook with touching turns.
Attach tinsel for the tip of the tag underneath the hook shank just slightly to the opposite side of the hook so that when you turn your first wrap it will start straight at the center.
Wrap 3 to 5 tight turns of tinsel from back to front and tie the tinsel in so that the last wrap doesn’t overlap the tag-end. Turn the excess adjacent to the shank and wrap forward to the point where you want your tail to be.
Attach a piece of floss underneath the shank. Burnish the underbody again and the tinsel tip too to make it smoother.
Wrap the floss carefully to the tinsel and back again and tie it in underneath the hook shank with couple of turns.
Strip off excess fibers from the topping and flatten the stem from the tie in point with pliers. Tie it in straight on top of the shank.
Do the same with an Indian Crow feather and try to tie it in flat straight on top of the topping.
Tie in a butt from blue Ostrich herl.
Tie the rib in underneath and again slightly on the opposite side of the hook. You can measure and mark the different body section with a marker, just make sure to measure space for the butts too.
Wrap forward again in touching turns and attach the floss for the first body section.
Make the rib with 5 turns of tinsel and try to keep the angle of the tinsel consistent.
Tie in a pair of Blue Chatterer feathers for the body veiling. Flatten the stems again to make the feathers easier to align.
Repeat on the other side of the hook.
Add another butt and rib as before.
Wrap the second body part and rib. To minimise the bulk of the tinsel at the tie in point you can tie it in with a couple of wraps and before cutting unravel the metal from the core which allows you to cut closer and make a smoother transition.
Tie in veilings of Toucan as before. You can play with the position where you tie them due to the shape of the rachis some feathers are easier to tie on the sides to achieve similar results instead of straight under the shank.
On the top it’s best to leave a gap between the ceilings for the wing to sit in.
When tying Ostrich herl for the butt make sure that when you start winding it the small barbules face backwards.

Image 23.

To minimise the bulk on the head you can reverse the tying of the last floss part.
Try to keep thread wraps minimal from this point forward as there is a lot of materials to tie on a tiny piece of hook.
The narrowing taper in front makes ribbing a bit harder but again try to keep the angle the same all the way.
Pay attention to proportions throughout the tying process.
Tie in three pairs of Indian Crow underneath the hook shank.
Because of the thick rachis on even the smaller Macaw feathers you can split the feather before tying.
Start the hackle from the top so that you’ll get more wraps on the sides and brow the hook.
Wrap the hackle in touching turns.
You can strip the fibers from the top to not get in the way of the wing. Moisten the hackle and draw it down.
Tie in the underwing straight on top to the shank.
Pick feathers that are just the correct length and form perfect pairs.
Flatten every feather with pliers before tying to achieve smaller and more secure tie in point.
View from above of the first pairs. Make sure the wing is symmetrical and straight.
Keep adding feathers in pairs to form the rest of the wing.
Pay close attention to the angle where every feather starts as it will define the shape of the wing.
Tie a narrow strip of Golden Pheasant tail over the wing.
Measure and shape the topping before tying it in. As with other feathers flatten the tie in point and fold it so that the topping doesn’t compress the wing but hugs it closely.
Check the fly from above and make sure the topping is straight on top.
Add Blue Chatterer feather cheeks.
Tie in horns and shape them with your fingernail to follow the shape of the wing and topping.
I like to tie the horns as close to the topping as possible and check that the angle is symmetrical from the top too.
Wax you thread well and make the surface of the head as flat as possible without adding too much bulk. If the head tapers too much it will be very hard to wrap the hero over it.
Wrap the hero from front to back so that the barbules naturally face forwards.
Fasten the herl to the base of the wing and make a finish the fly to the same point. Moisten the herl head and turn the barbules back over the thread wraps. Carefully cut the excess with a razor blade or sharp scissors.
When the herl has dried a bit brush it to separate the barbules. Carefully add couple layers of varnish to the front of the head to finish the fly. you can also use a marker to color the head black or use black varnish in one of the layers.
View from above of the finished fly.
Finished Nepenthian.


Posted on Leave a comment

The two rod system

Like many silver chasers I too like to carry around two rods when I’m fishing. There are several reasons to do this and I’m going write a few lines about this subject on the following post.

Backup rod

When you carry two rods, you will always have a backup ready to go if something goes horribly wrong. This is especially important if you are fishing a river that requires a lot of walking to reach the pools. I personally don’t want to lose one day in my fishing season because I did not have a backup rod with me.

Sh%t happens
Sh%t happens


Short rod, Long rod…

I usually carry two different length rods with me. For example a 13’6” and a 15’ on a big river or a 13’ and a switch on a smaller one. If the fishing requires a lot of precision, then it’s a switch rod and a single hander. Bigger rods are nicer on wide open pools and if you have to wade deep. Shorter ones are excellent if your back is against the bush or if you have to “work” the fly during the swing. I can also fish the fly differently with a different length rod.

Set of different lenght rods ready to go
Switch rods rock for Pacific salmon.


Different lines…

I always rig my rods with different lines. I think that many times it can make a huge difference when you fish through a pool with a different line. My most used set up is to rig two multi tip shooting heads, one with a floating body, the other with an intermediate body. This way I can change the tips on both lines to fine tune my swing. I love to use heads that have an Skagit label on them. This does not however mean I use them as a “real” Skagit… I use them both as a “normal” scandi shooting head and in other places like a “real” Skagit. That’s a whole other story, so I won’t go any deeper on that subject. All and all the line choices are always dictated by the conditions on the water and the spot I’m fishing at. So there are endless combinations that I use.

MY favourite
MY favourite Atlantic salmon set up for summer fishing. 15′ Meiser Highlander with a F/I/sink2 line and 13′ Echo TR with a 420gr skagit rigged up with a 12′ clear tip.


Having fun…

This is something that I always emphasis in all things fishing related. It has to be fun! Using different rods during a slow day of fishing is a great source of motivation. A little change always brightness up a slow day.

So remember to have fun! Tight lines, not tight faces.

Have FUN!
Have FUN!

[fbls]

Posted on Leave a comment

Dreaming about my home away from home

I’m sure that many of you have a similar place where you just feel like your home. For me this place is British Columbia in western Canada, to be more precise the Lower Mainland area and Vancouver Island. The fishing is awesome, the people are the nicest people you will find anywhere and it is very easy to move around and do things. The scenery is pretty nice also.

The mix of all these things makes it just a darn nice place to be and with the current euro vs CAD currency rate, pretty much the cheapest world class fishery there is.

The Harrison river
The Harrison river
My friend Pekka fighting a fish of a lifetime. A big chrome Chinook is taking him for a ride

I know that the renowned steelhead waters of the Skeena area get most of the media hype, but there really is world class fishing in the south as well. I’ve caught all 5 species of salmon, trout and steelhead there and I just love fishing there. What could be more fun then catching chrome Chinook and Chum on the fly? In my book not many things.

The sign of quality
The sign of quality

Especially the Chum fishing is very underrated and carry a bad rep. They just are super fun when you target the fish that are pushing in with the tide. For me they are more of a fly fishers fish then the mighty Chinook as you can target them in slower and shallower water and don’t need heavy sinking heads to catch them. Many times have I fished tidal areas where you see a school of Chums come in and then you just put the fly in front of them and get ready for one hell of a ride. It’s like sight fishing for Bonefish in a river! In my book they are also the toughest fighting fish that swim in freshwater. I have caught Atlantic salmon and Chinook up to 40lb and several saltwater species including Tarpon, Tuna and Bones and have to say that the fresh Chums are right up there with the best. When you hook a fresh, 20-25lb male Chum you are in to the best ride there is in freshwater. They will test your gear and fish fighting ability’s with their brute strength and unpredictable behavior.

When you hit brutes like this you know your going to get a workout.
Big fresh Chum putting a deep bend on my rod

So, if you have nothing planned for this fall, go ahead and book your flights to Vancouver. They are predicting a huge run of salmon this year. I’m going for sure!

When you start catching fish like this, it is very addicting. My friend Janis with a silver chum
Perry throws some mean line on a twohander

Contact my friend and super guide Perry Wilson for more info on Vancouver island fishing and me if you want to hook up with a good guide on the Lower Mainland. No, I’m not guiding there, but can recommend someone to you if your looking. You can find Perry’s website here: http://www.northlandfly.com/index.htm

Tight lines!

[fbls]